
Your First Map
A step-by-step tutorial for building a two-stage Map with input blocks and content blocks.
Now that you've created a Map, build your first stage by adding an input block. This tutorial picks up from where Getting Started left off, with your Map open in the builder.
The Map Builder
After creating a Map, you'll land in the Map Builder with a single stage called "First stage".
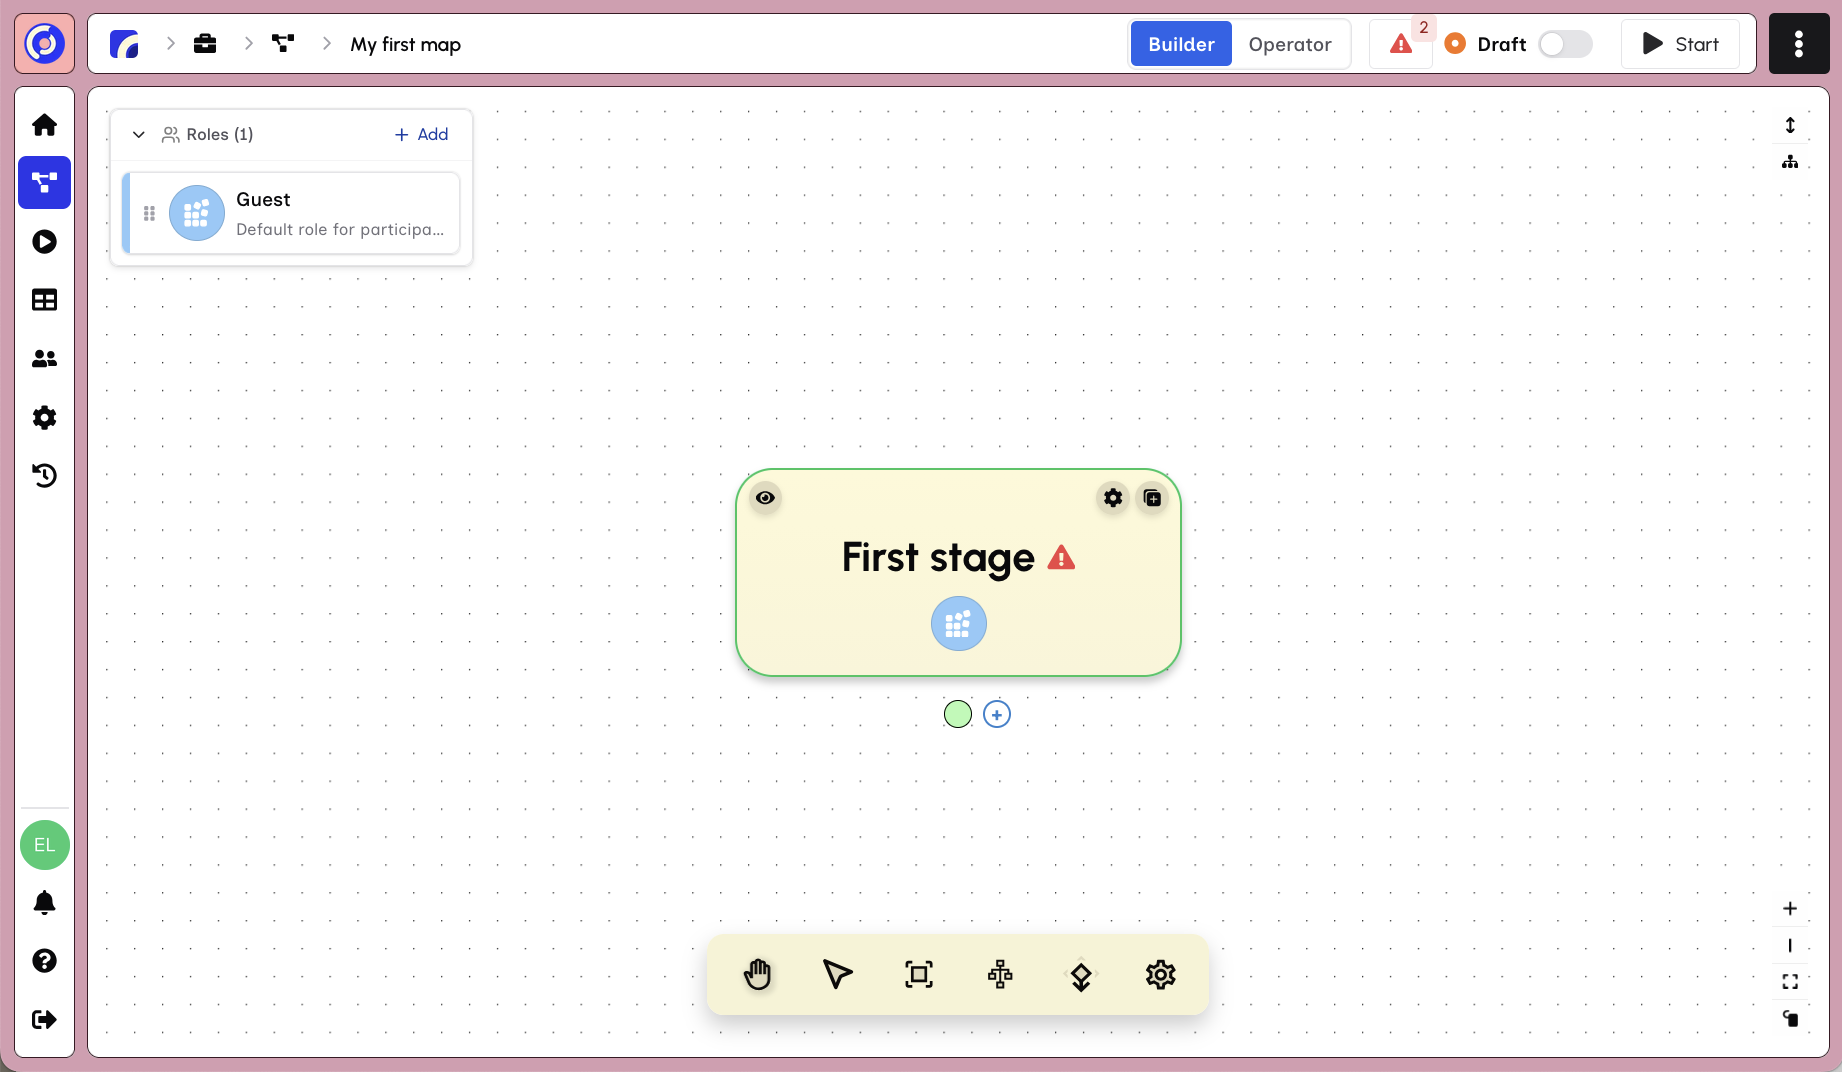
The builder shows:
- Roles panel (left) - Your Map has a default "Guest" role
- Stage canvas (center) - The "First stage" node with a warning indicator
- Canvas controls (bottom) - Tools for navigating and organizing the canvas
Selecting a Stage
Click on "First stage" to open the stage editor panel.
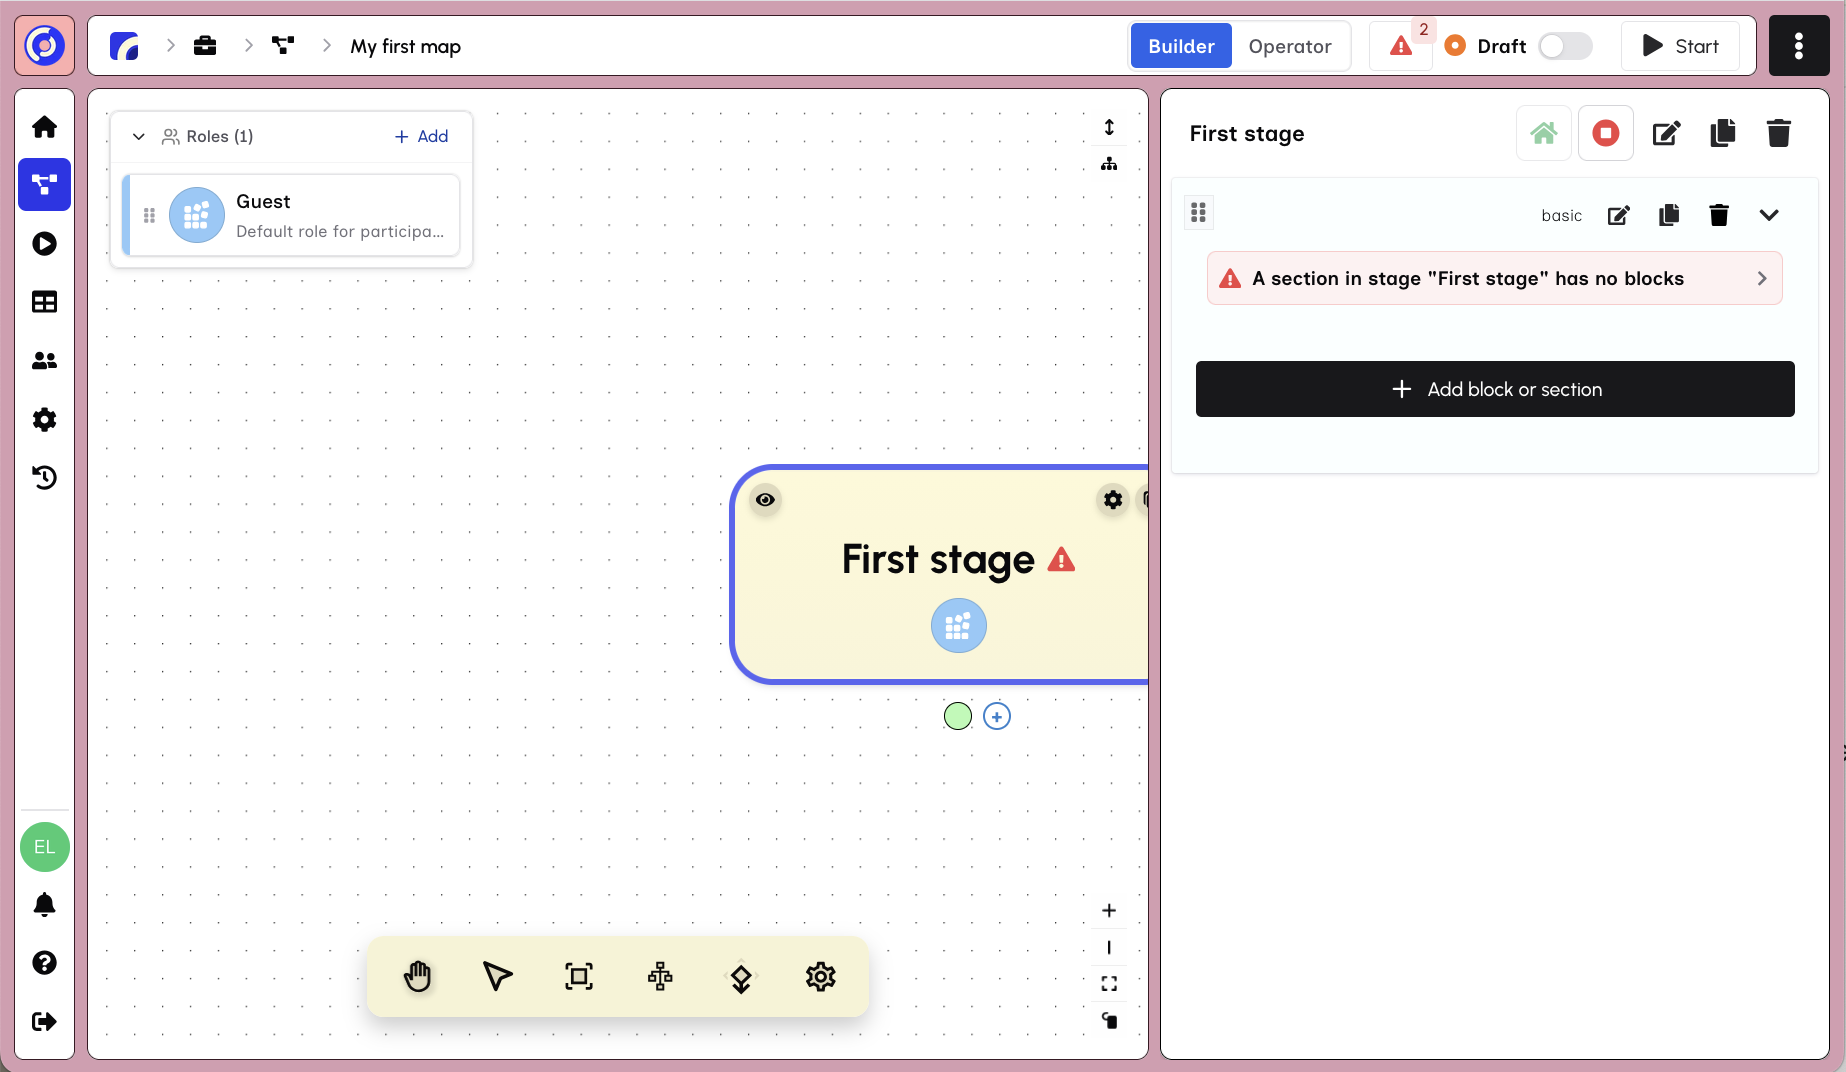
The stage panel shows:
- Stage title with edit, Set Start, Set End, and delete options
- Section called "basic" with a warning that it has no blocks
- "+ Add Block or Section" button to add content
Adding a Block
Click "+ Add Block or Section" to open the component picker.
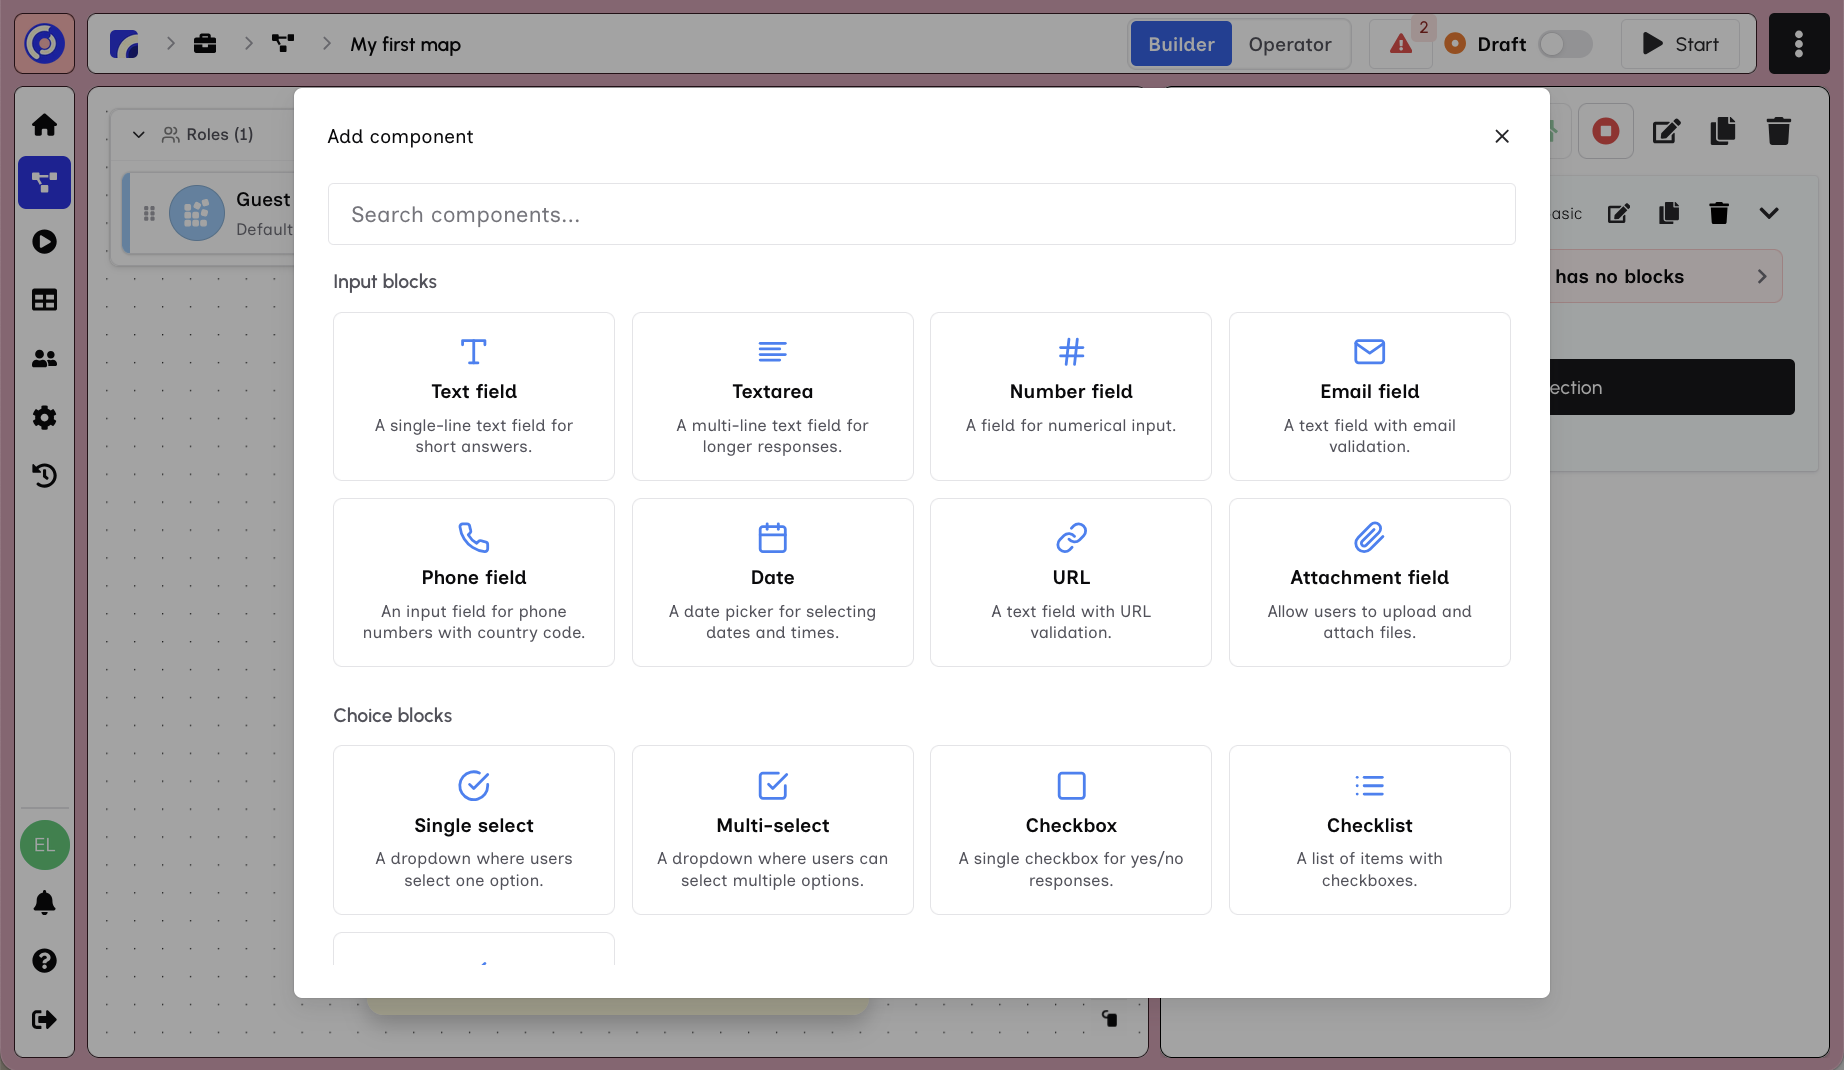
The component picker shows available block types:
- Input Blocks - Text Field, Textarea, Number, Email, Phone, Date, URL, Attachment
- Choice Blocks - Single Select, Multi-Select, Poll, Checkbox, Checklist, Todo
- Content & Media - Content, Iframe, Video, Resource, Image Gallery
- Specialized - Discussion, Review
- Sections - Basic Section, Sheet Section
Click "Text Field" to add a single-line text input to your stage.
Configuring the Block
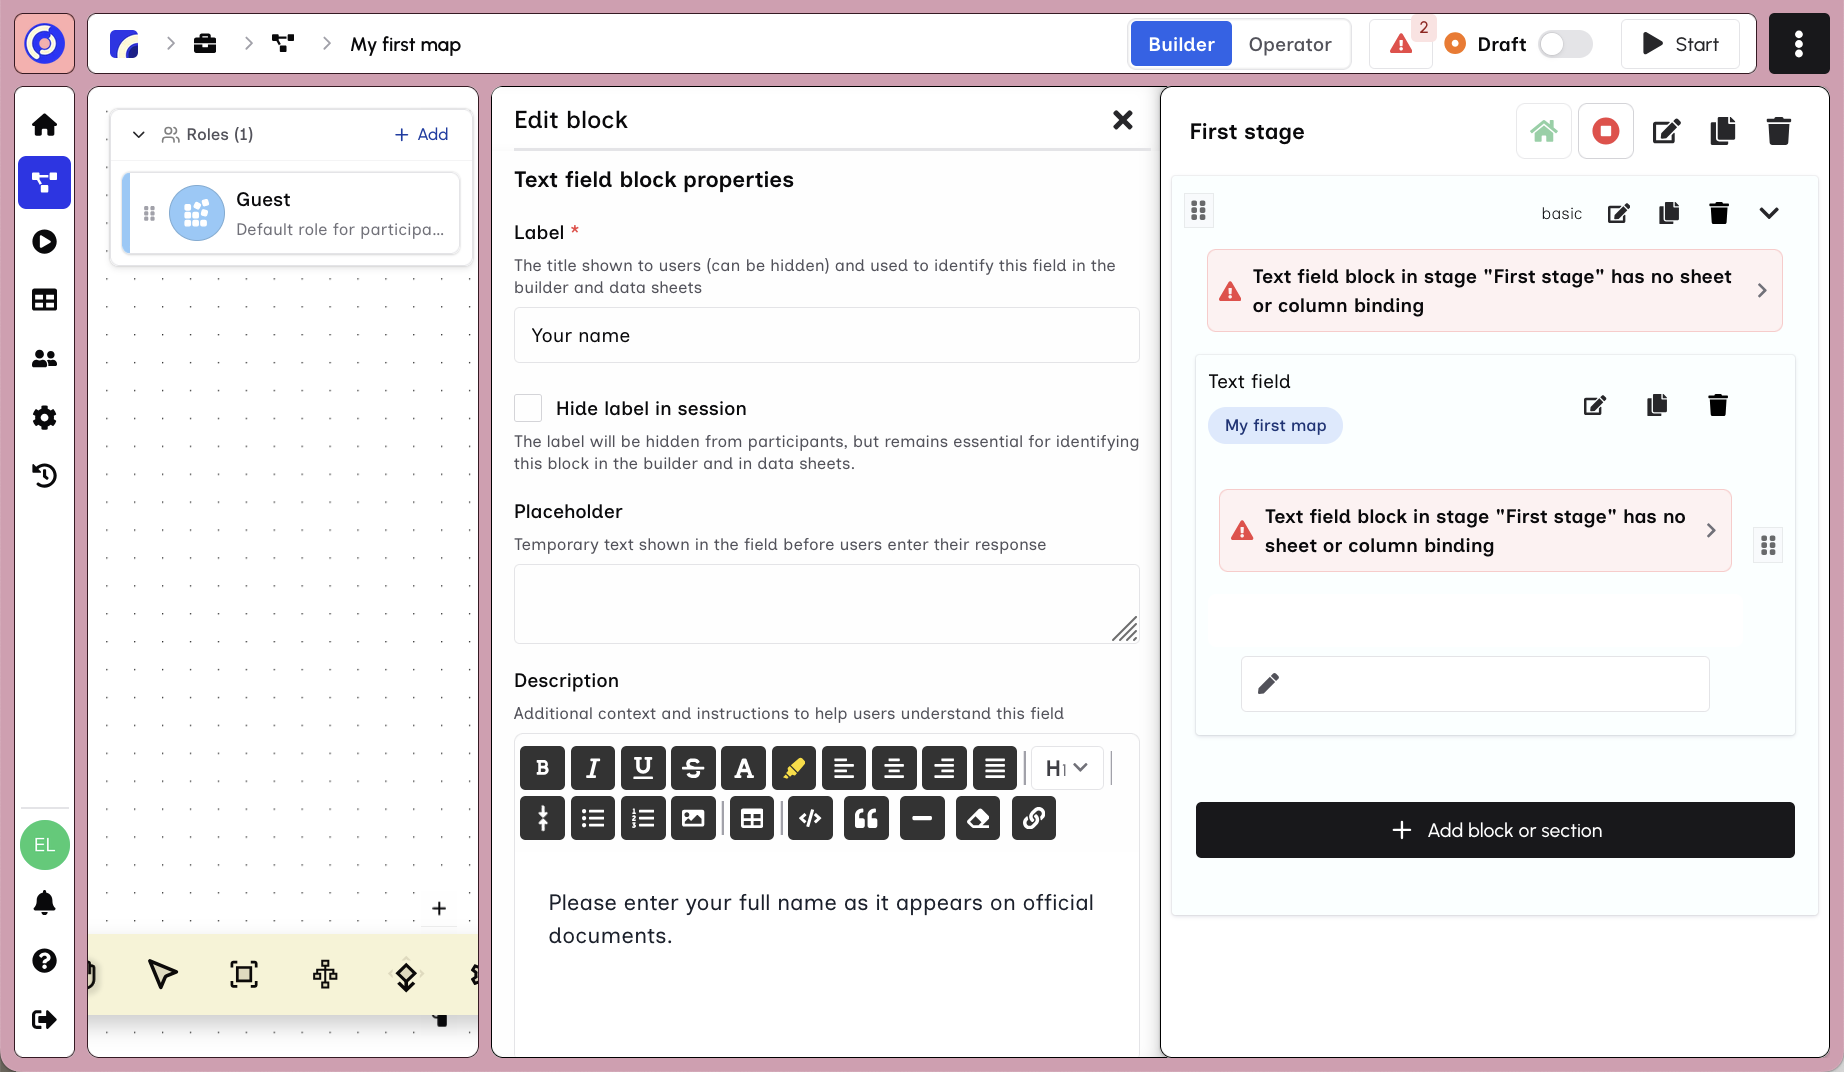
After adding a Text Field, the block configuration panel opens.
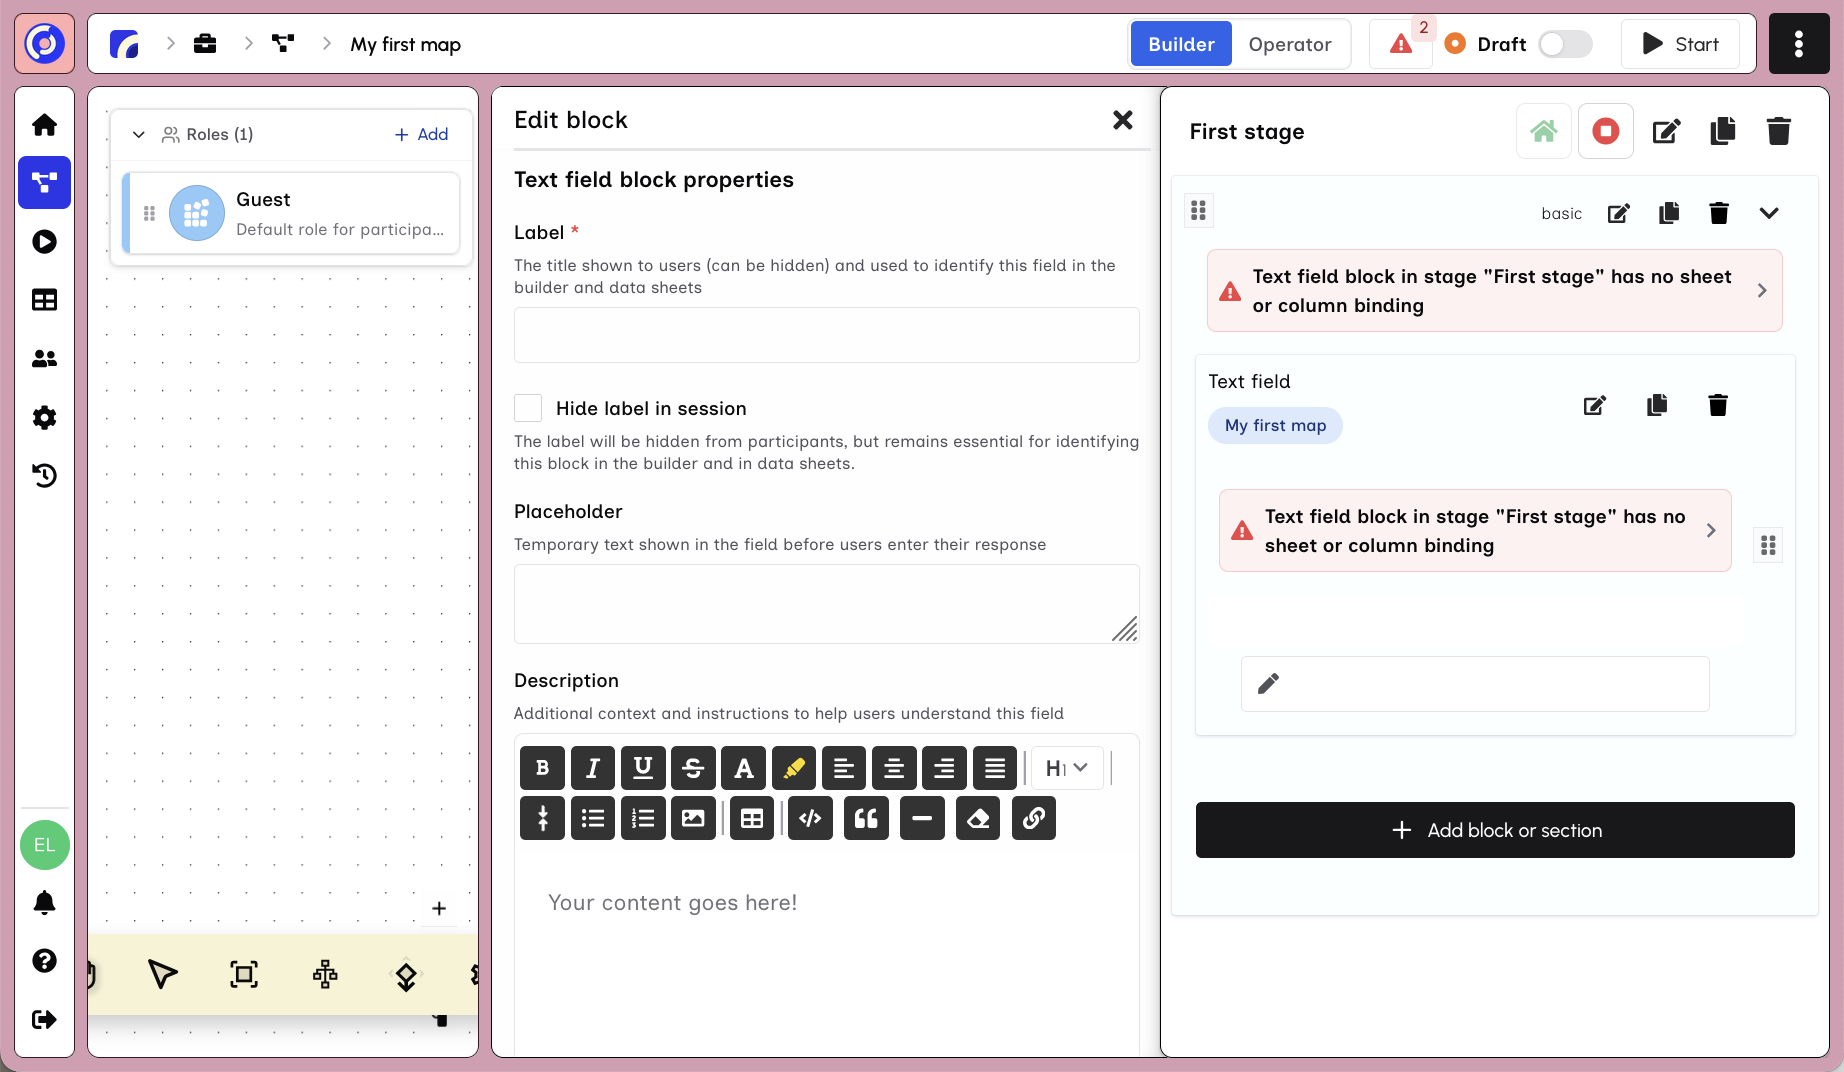
The configuration panel includes:
- Label (required) - The title shown to users
- Hide label in session - Option to hide the label from participants
- Placeholder - Hint text shown before users enter a response
- Description - Rich text instructions to help users understand the field
Fill in the Label (e.g., "Your Name") and add a Description to guide users.
Sheet and Column Settings
Scroll down in the configuration panel to see the data binding settings.
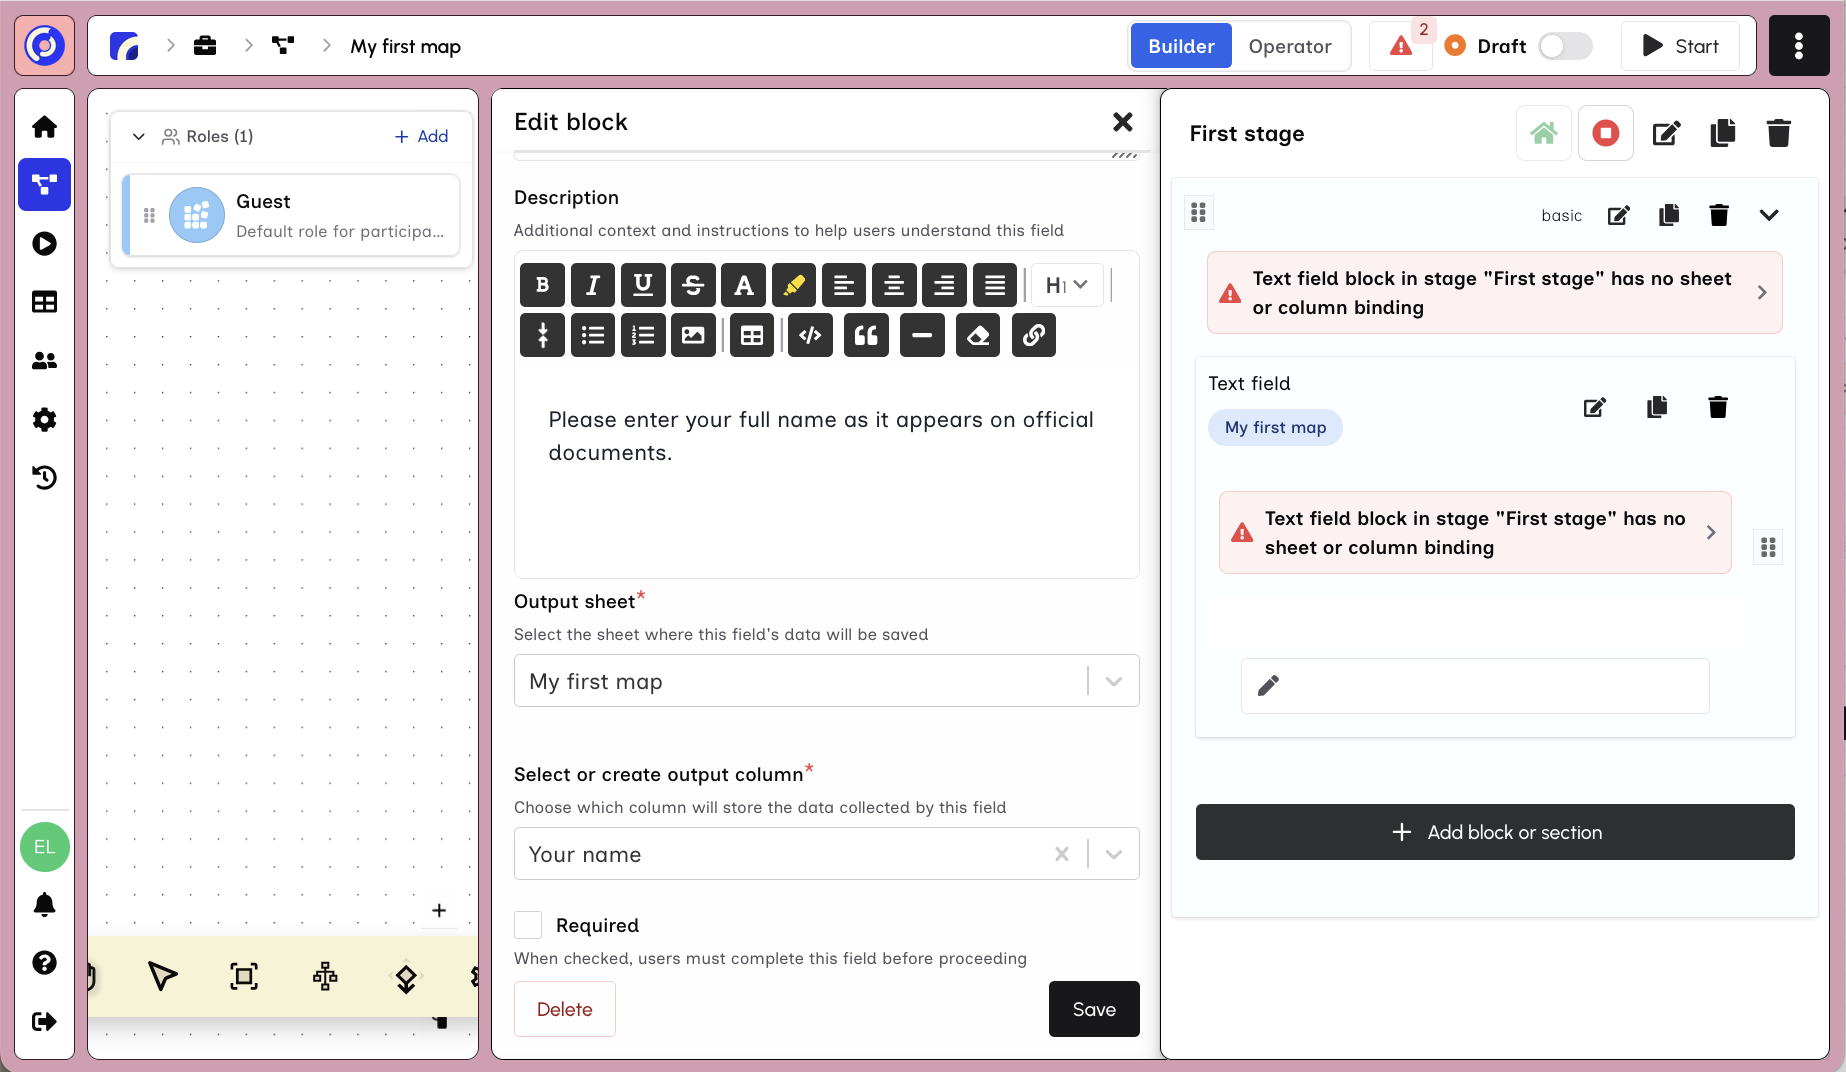
These settings control where the collected data is stored:
- Output Sheet - The sheet where responses will be saved (defaults to your Map's sheet)
- Select or Create Output Column - The column that will store this field's data
- Required - Whether users must complete this field before proceeding
The column name is auto-suggested based on your label.
Saving Your Block
Click Save to save your block configuration.
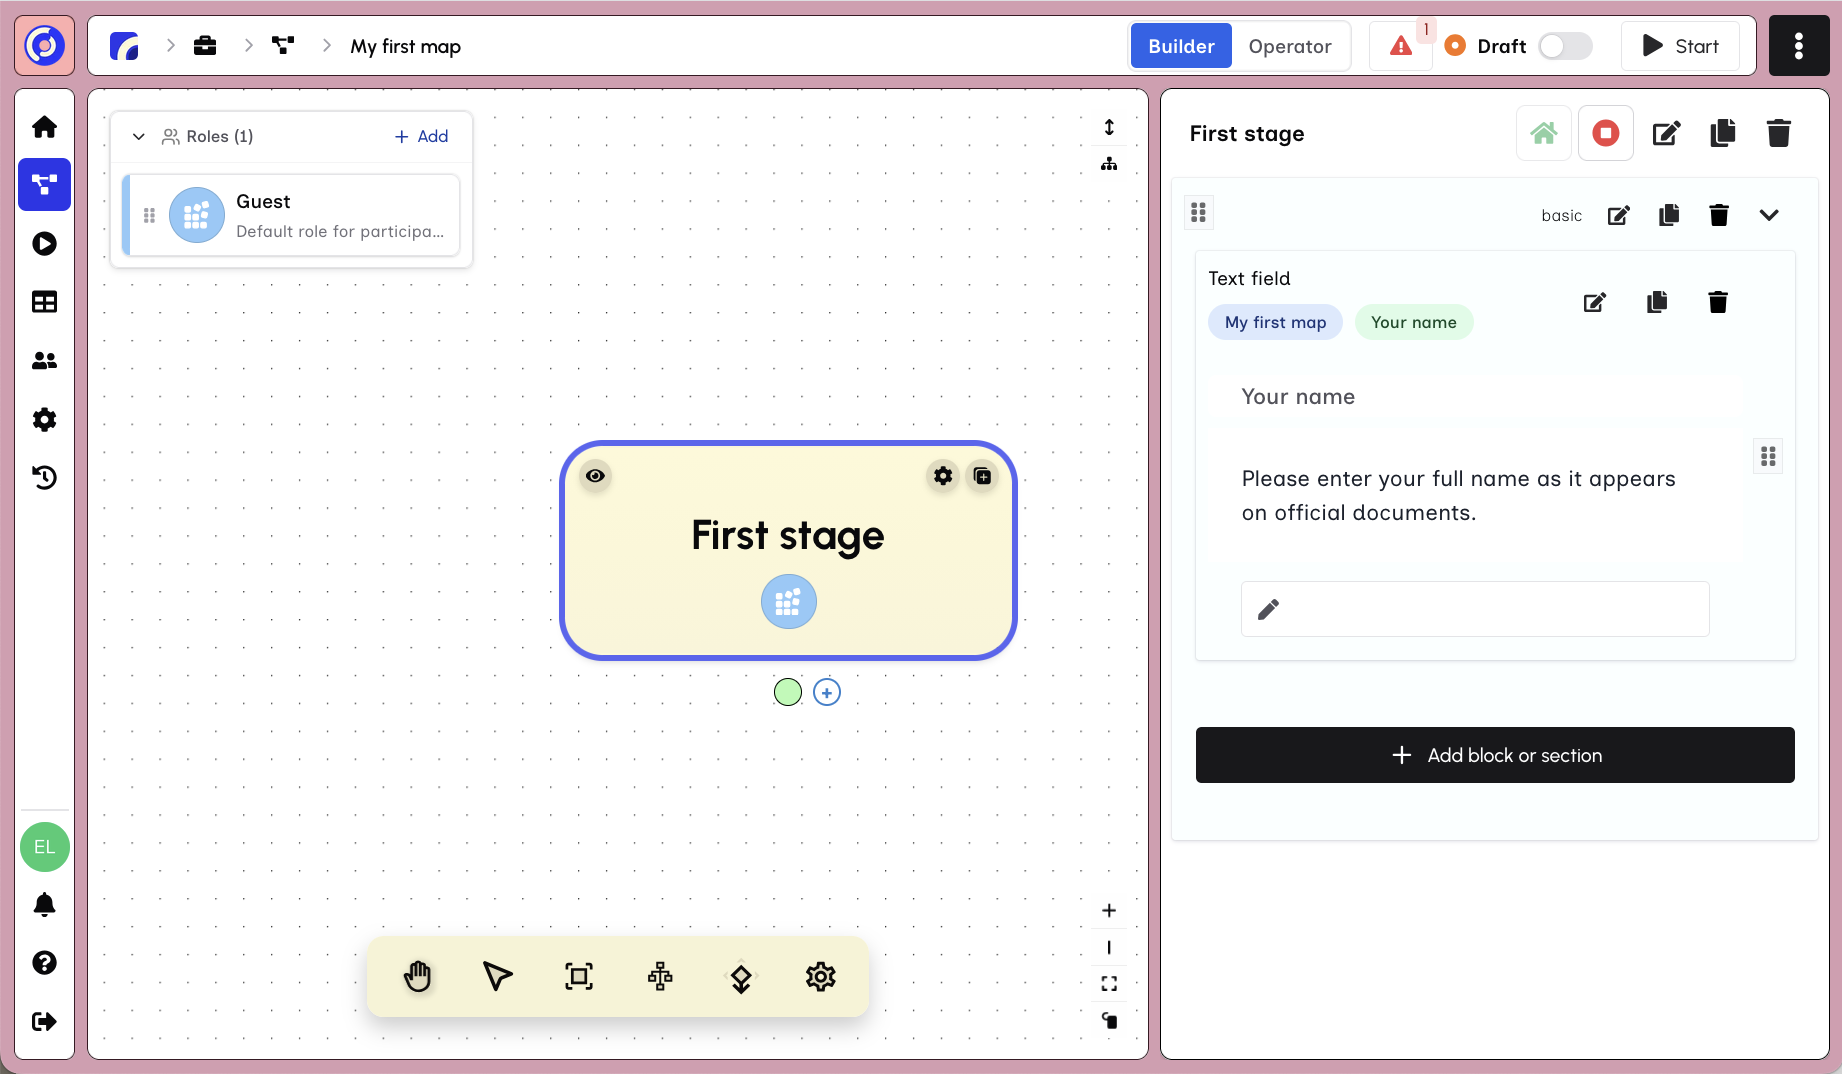
Your block is now saved and appears in the stage panel showing:
- The block type (Text Field)
- The sheet and column binding
- The label and description
You've added your first input block. Continue adding blocks to build out your Map stage.
Adding a Second Stage
Add another stage to make a multi-step Map. You can create new stages by dragging from an existing stage's connection point.
To add a new stage:
- Hover over the green circle at the bottom of "First stage" (the source handle)
- Click and drag downward to create a new connection
- Release to create a new stage called "New stage 2"
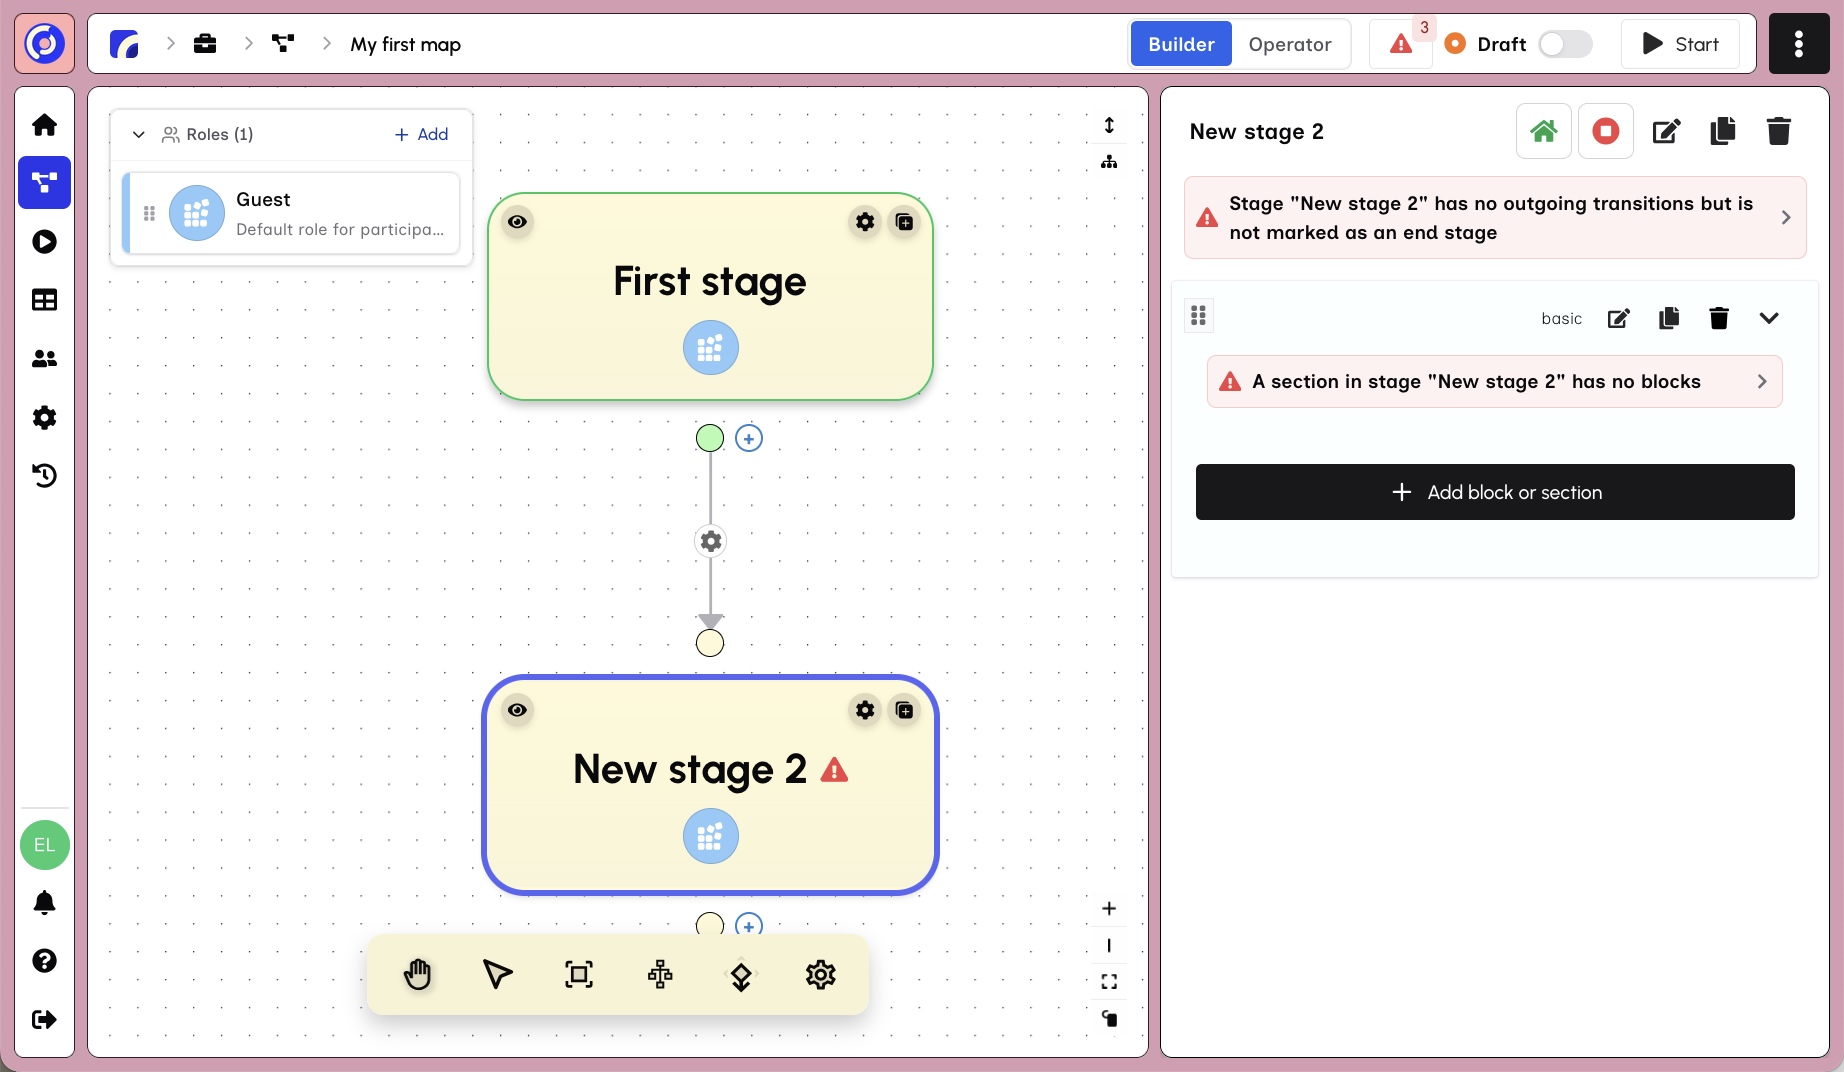
Your Map now has two connected stages. The new stage opens automatically in the stage panel, showing:
- Stage title "New stage 2" with edit and delete options
- Warning that the stage has no outgoing transitions and isn't marked as end
- Empty section waiting for blocks
Adding a Content Block
Add a Content block for the completion message. Click "+ Add Block or Section" to open the component picker.
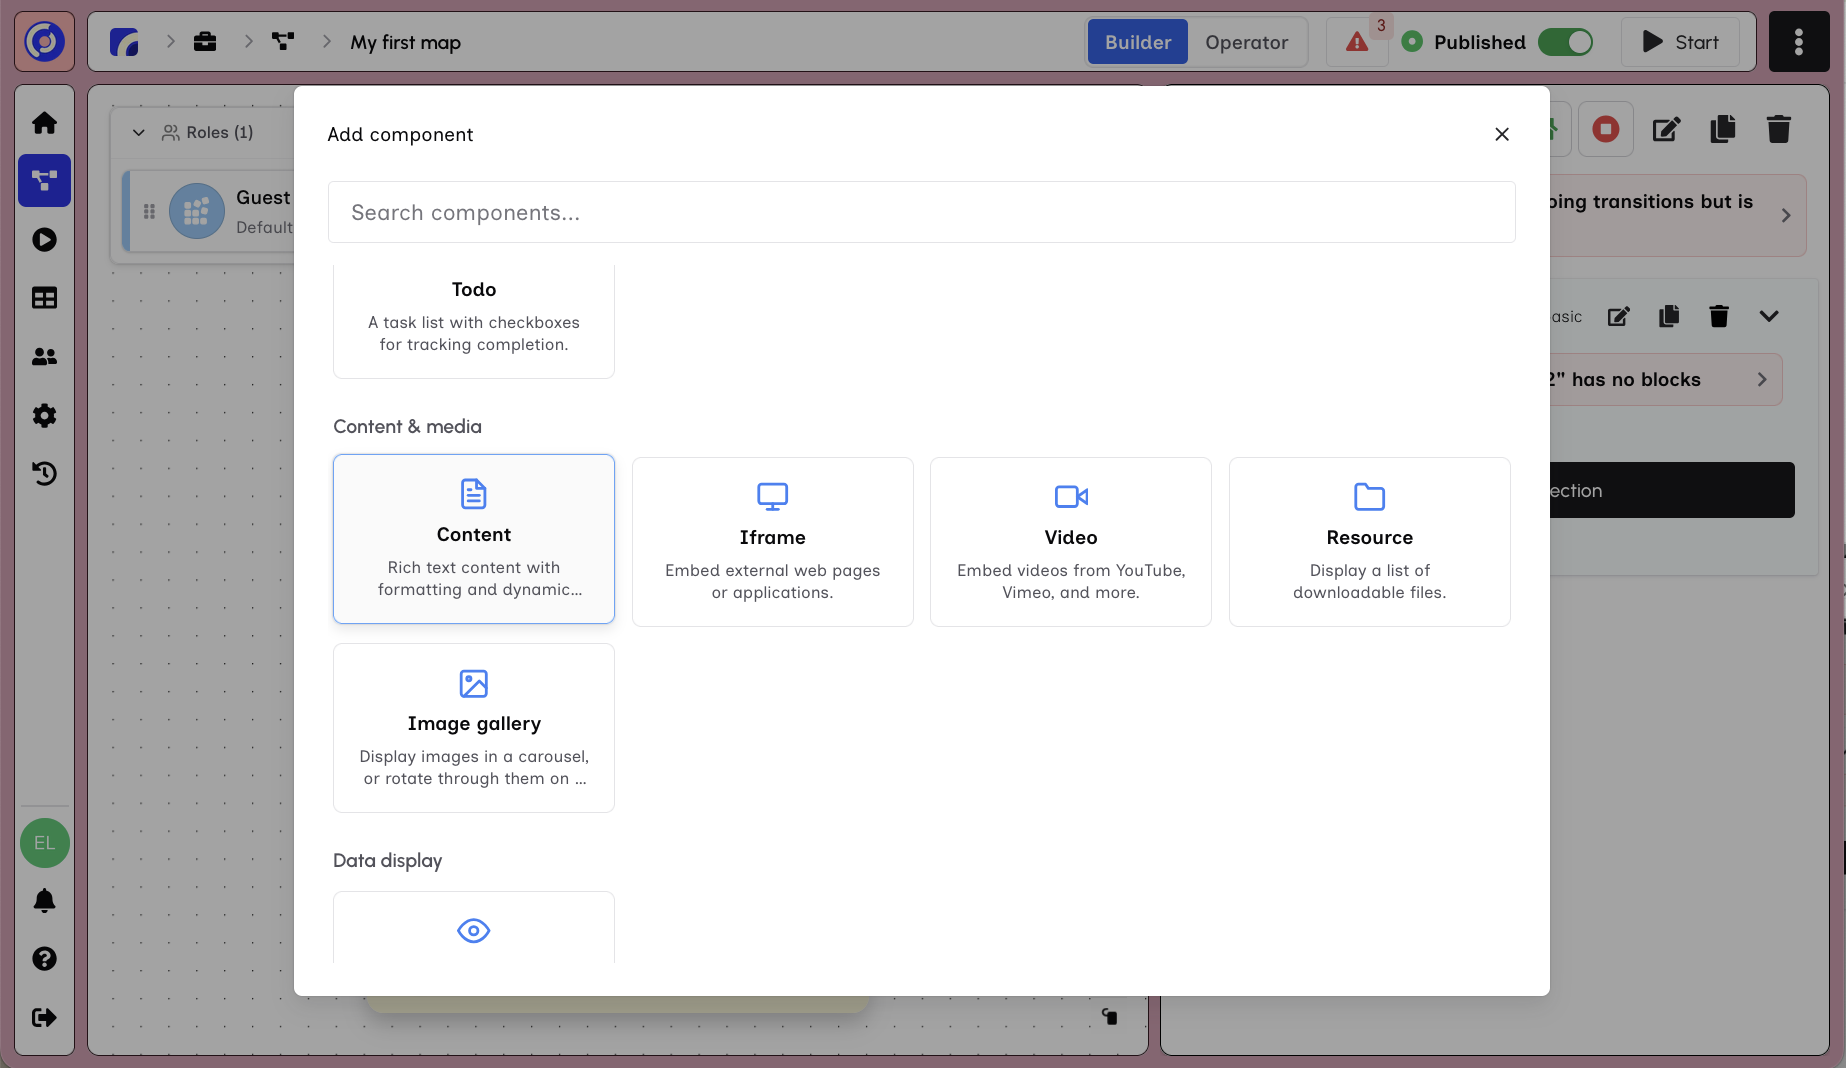
Scroll down to Content & Media and click "Content" to add a rich text content block.
Editing Content
After adding the Content block, the rich text editor opens.
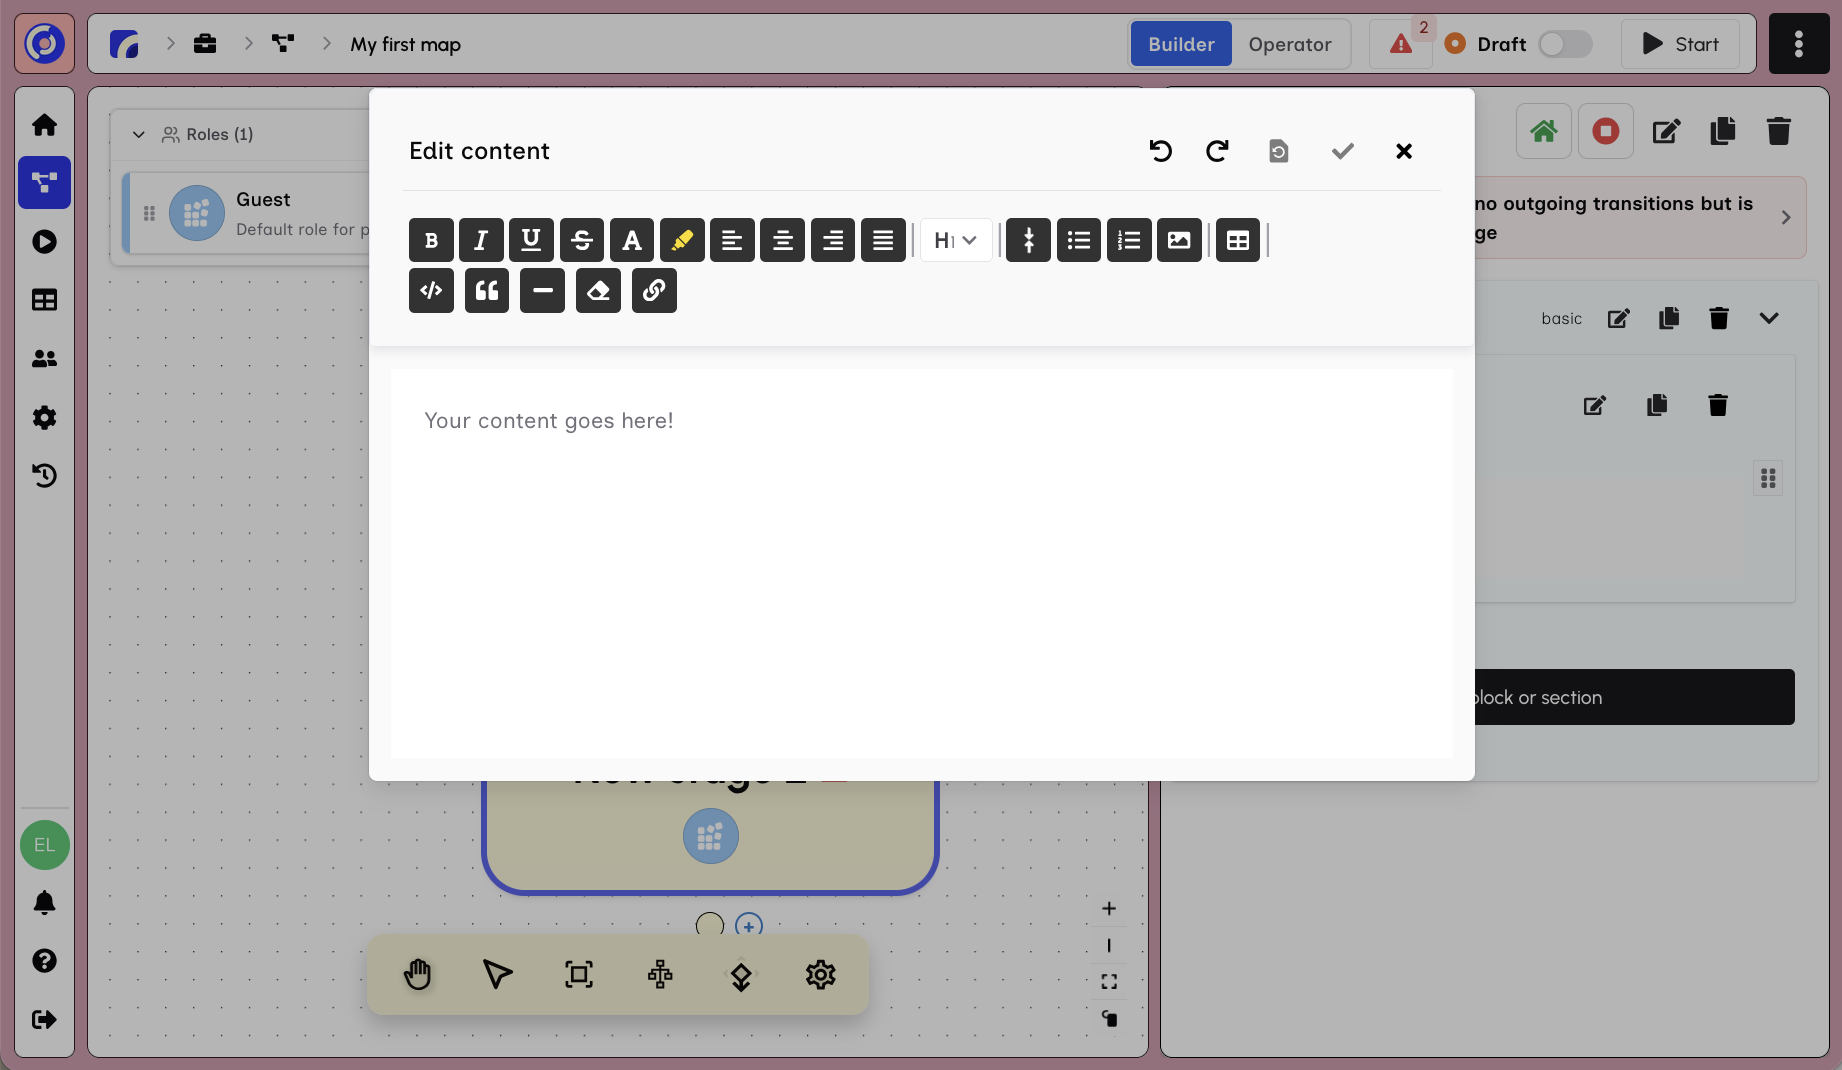
The content editor includes:
- Toolbar with formatting options (bold, italic, underline, strikethrough)
- Alignment buttons for left, center, right, and justify
- Headings dropdown for text hierarchy
- Lists for bullets and numbered items
- Media options for images, tables, and more
- Text area with placeholder text "Your content goes here!"
Writing Your Content
Type your completion message in the editor.
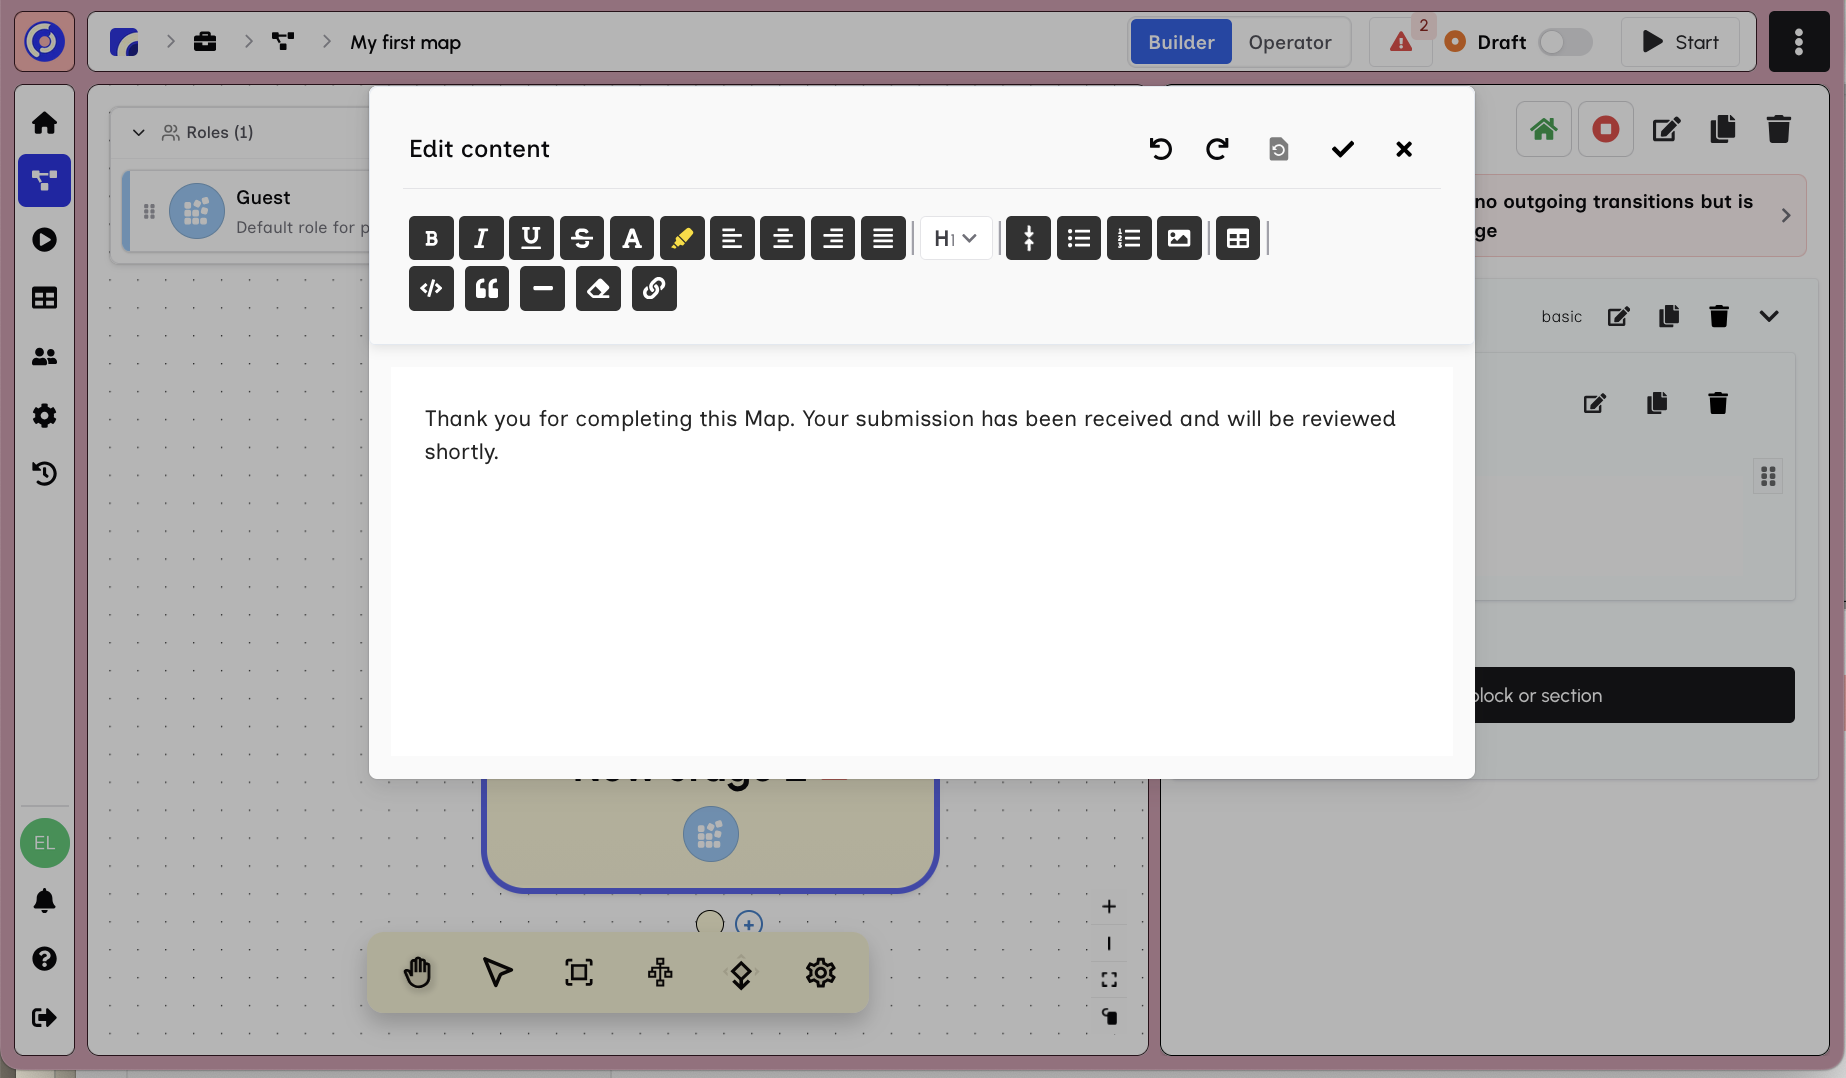
For example: "Thank you for completing this Map. Your submission has been received and will be reviewed shortly."
Click Save Changes (the checkmark icon) to save your content.
Map with Two Stages
After saving, your Map now has two complete stages.
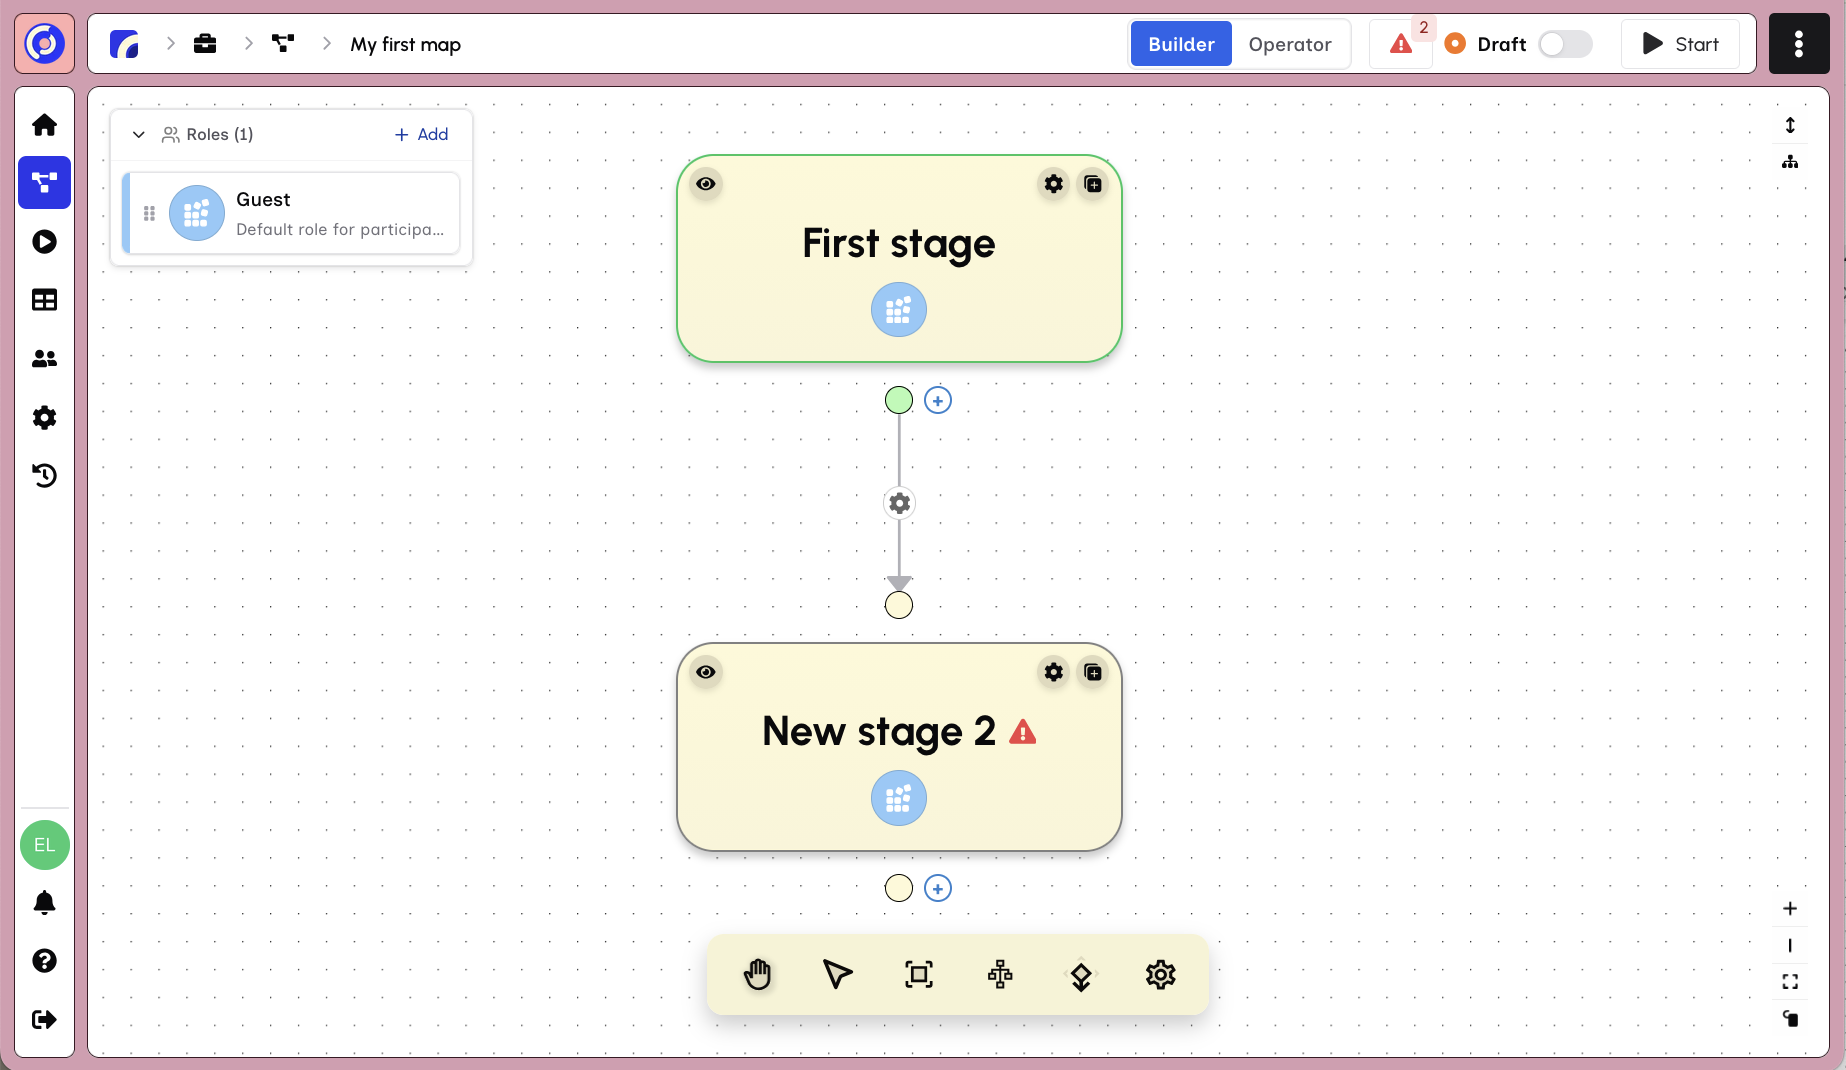
You've built a two-stage Map with:
- First stage - A form collecting user input with a Text Field
- New stage 2 - A completion message using a Content block
From here, you can:
- Add more stages and blocks
- Configure transitions between stages
- Set up roles and permissions
- Publish your Map to start collecting responses
Fixing Validation Errors
You may notice a warning indicator in the top toolbar showing validation errors. Click on the error count (the red triangle with a number) to open the Map Validation dialog.
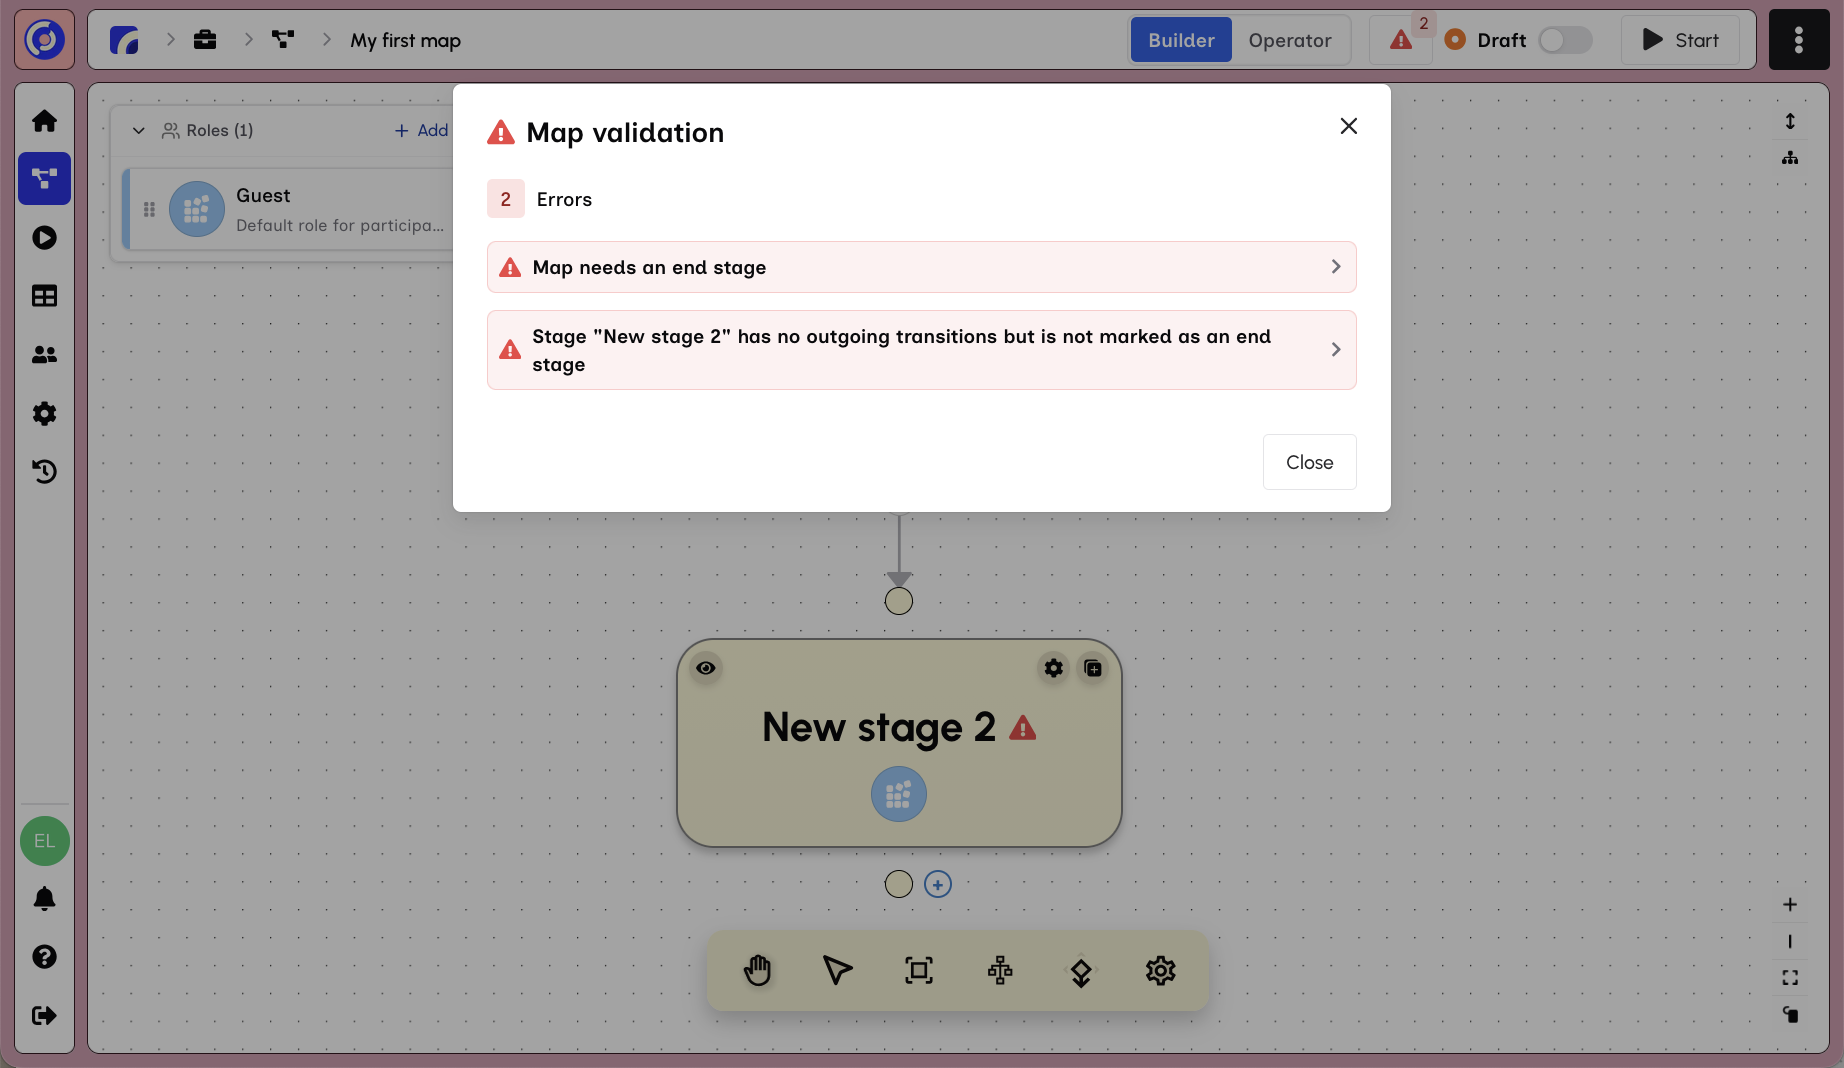
The validation dialog shows:
- Error count - Total number of issues to fix (2 Errors)
- Error list - Each validation issue with expandable details
The two errors shown are:
- "Map needs an end stage" - Every Map must have at least one stage marked as the endpoint
- "Stage 'New stage 2' has no outgoing transitions but is not marked as an end stage" - A stage without outgoing connections must be designated as an end stage
Click Close to dismiss the validation dialog.
Setting an End Stage
To fix the validation errors, click on "New stage 2" to open the stage panel.
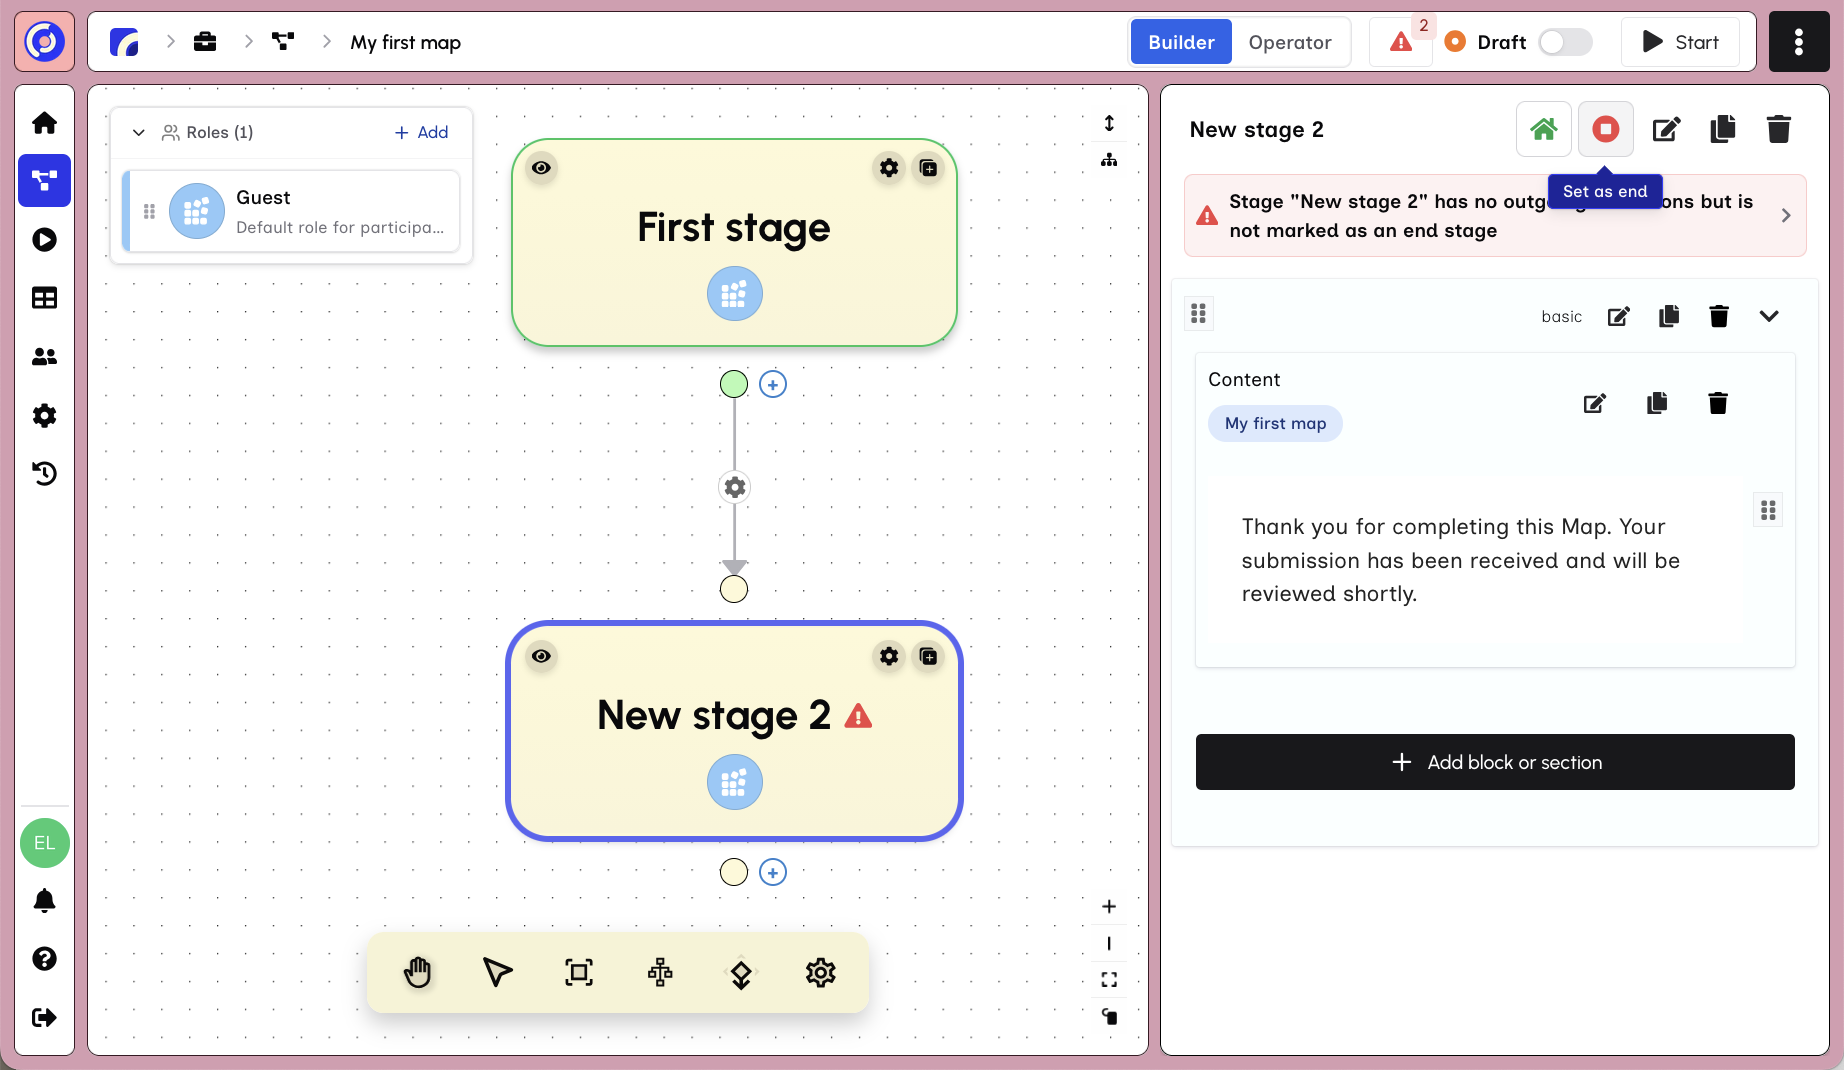
The stage panel header shows:
- Stage title "New stage 2" with an edit button
- Set Start - Marks this stage as a Map starting point
- Set End - Marks this stage as a Map endpoint
- Delete button to remove the stage
The warning banner explains why this stage needs attention. Click "Set End" to mark this stage as an endpoint.
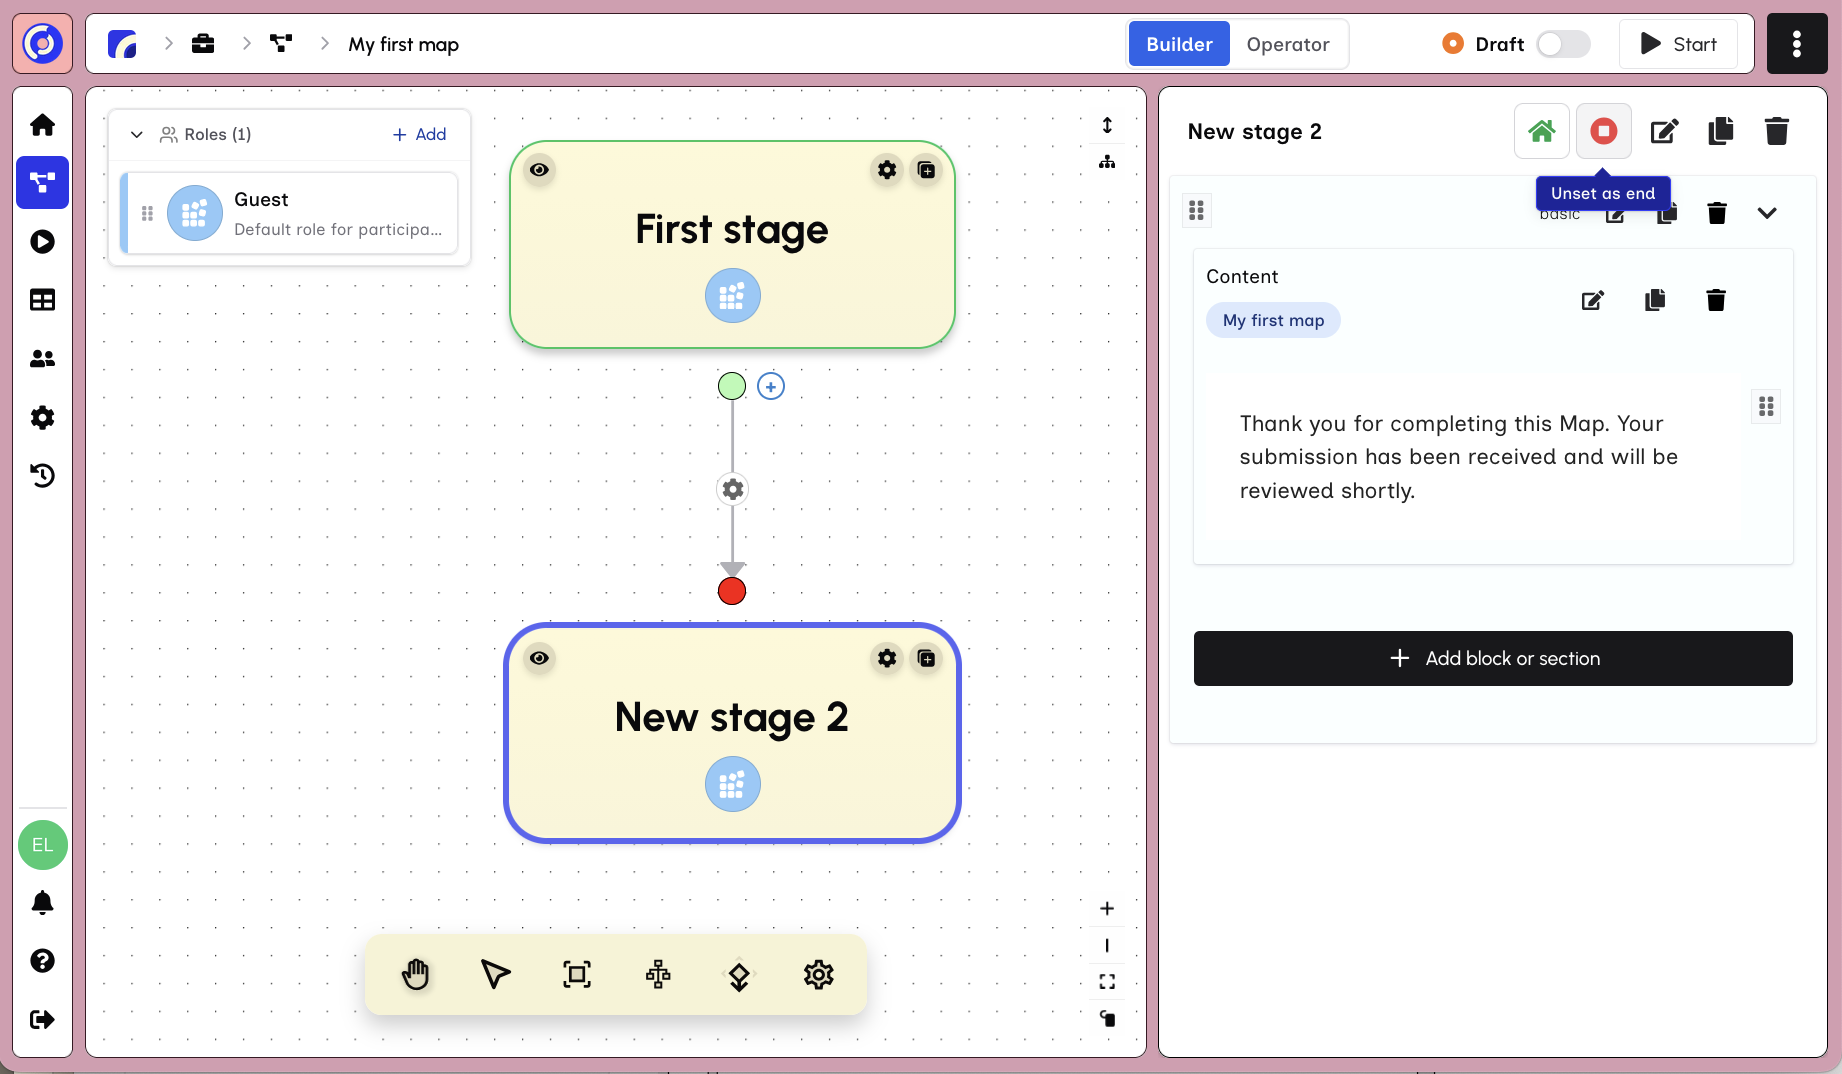
After clicking Set End:
- The "Set End" button changes to "Unset End" (shown with a filled red circle)
- The warning banner disappears from the stage panel
- The warning triangle disappears from the stage node
- A red end indicator appears on the connection line
- The validation errors are resolved
The Map is valid and ready to publish.
Previewing Your Map
You can preview your Map at any time—even while it's still in Draft mode. You don't need to publish your Map to test it. This lets you verify your blocks, content, and flow before making it available to participants.
There are two ways to access the preview.
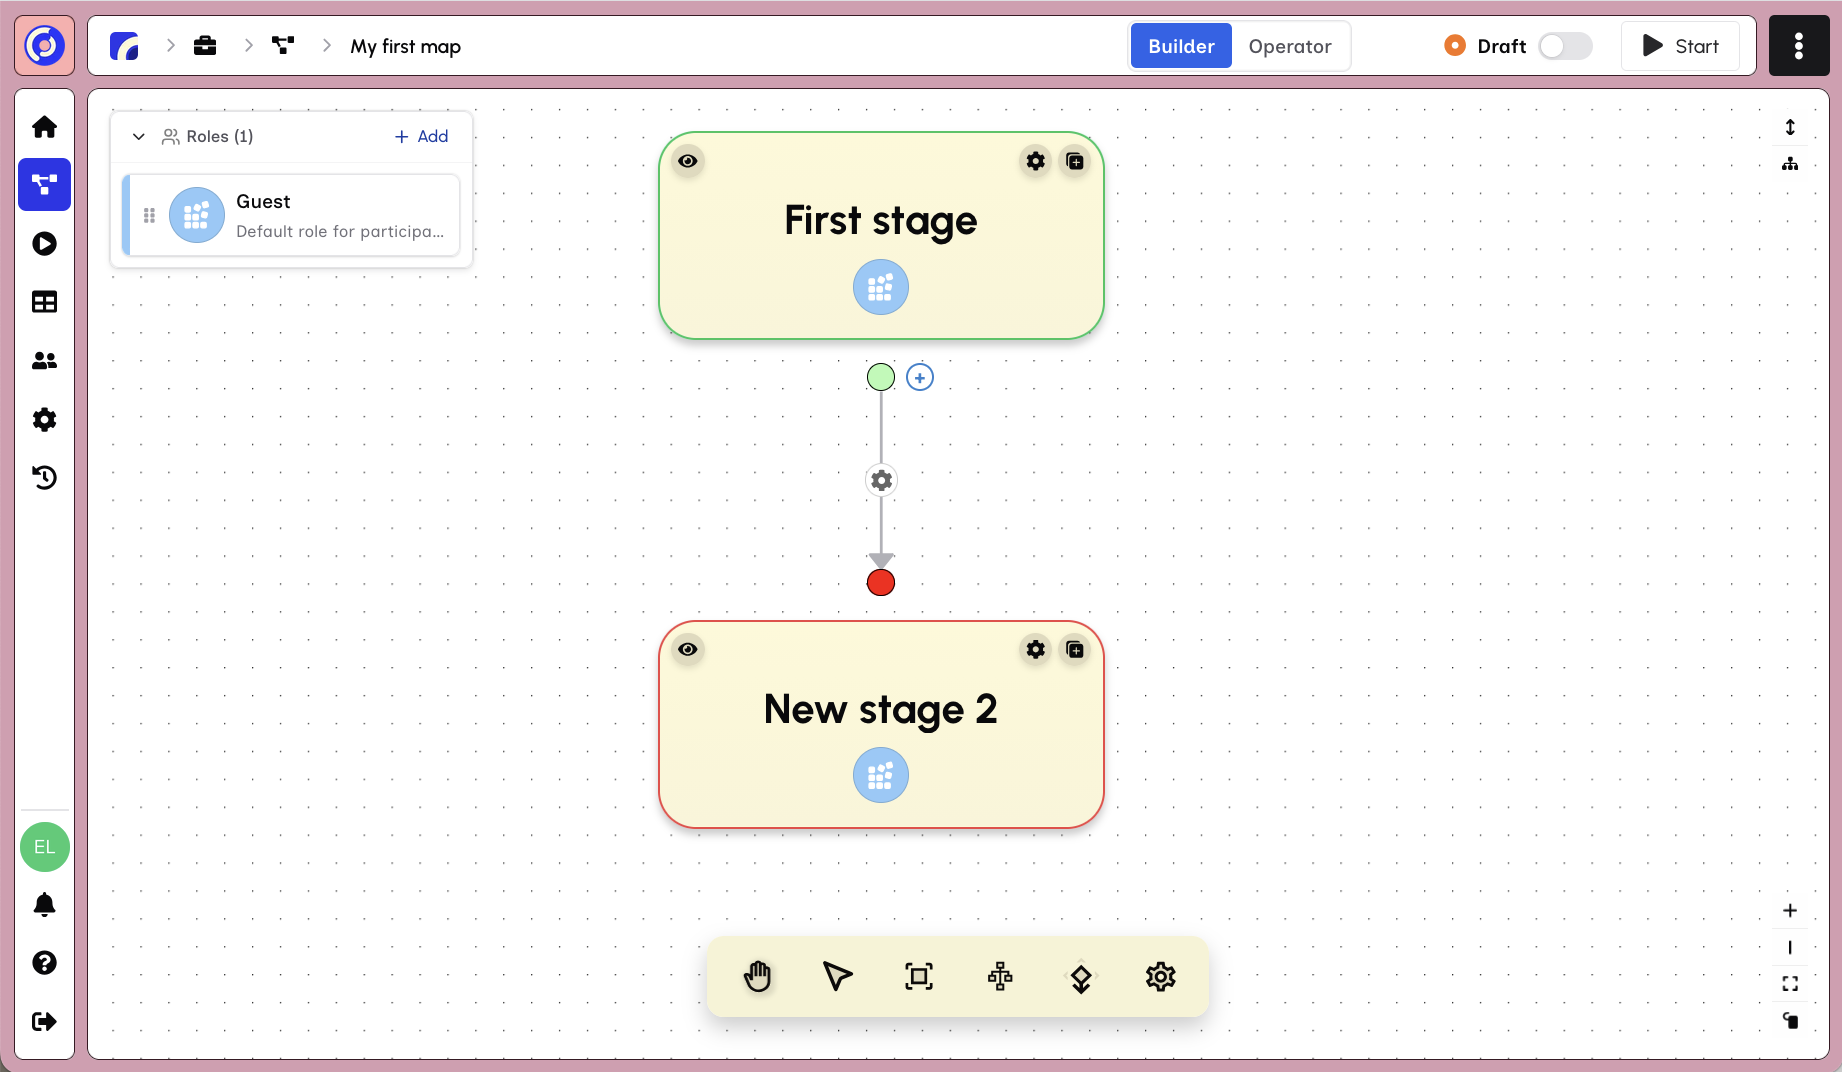
Option 1: Eye icon on stage nodes
Each stage node has an eye icon (👁) in the top-left corner. Click this icon to preview that specific stage directly.
Option 2: Start menu
Click the Start button in the top toolbar to open the start menu.
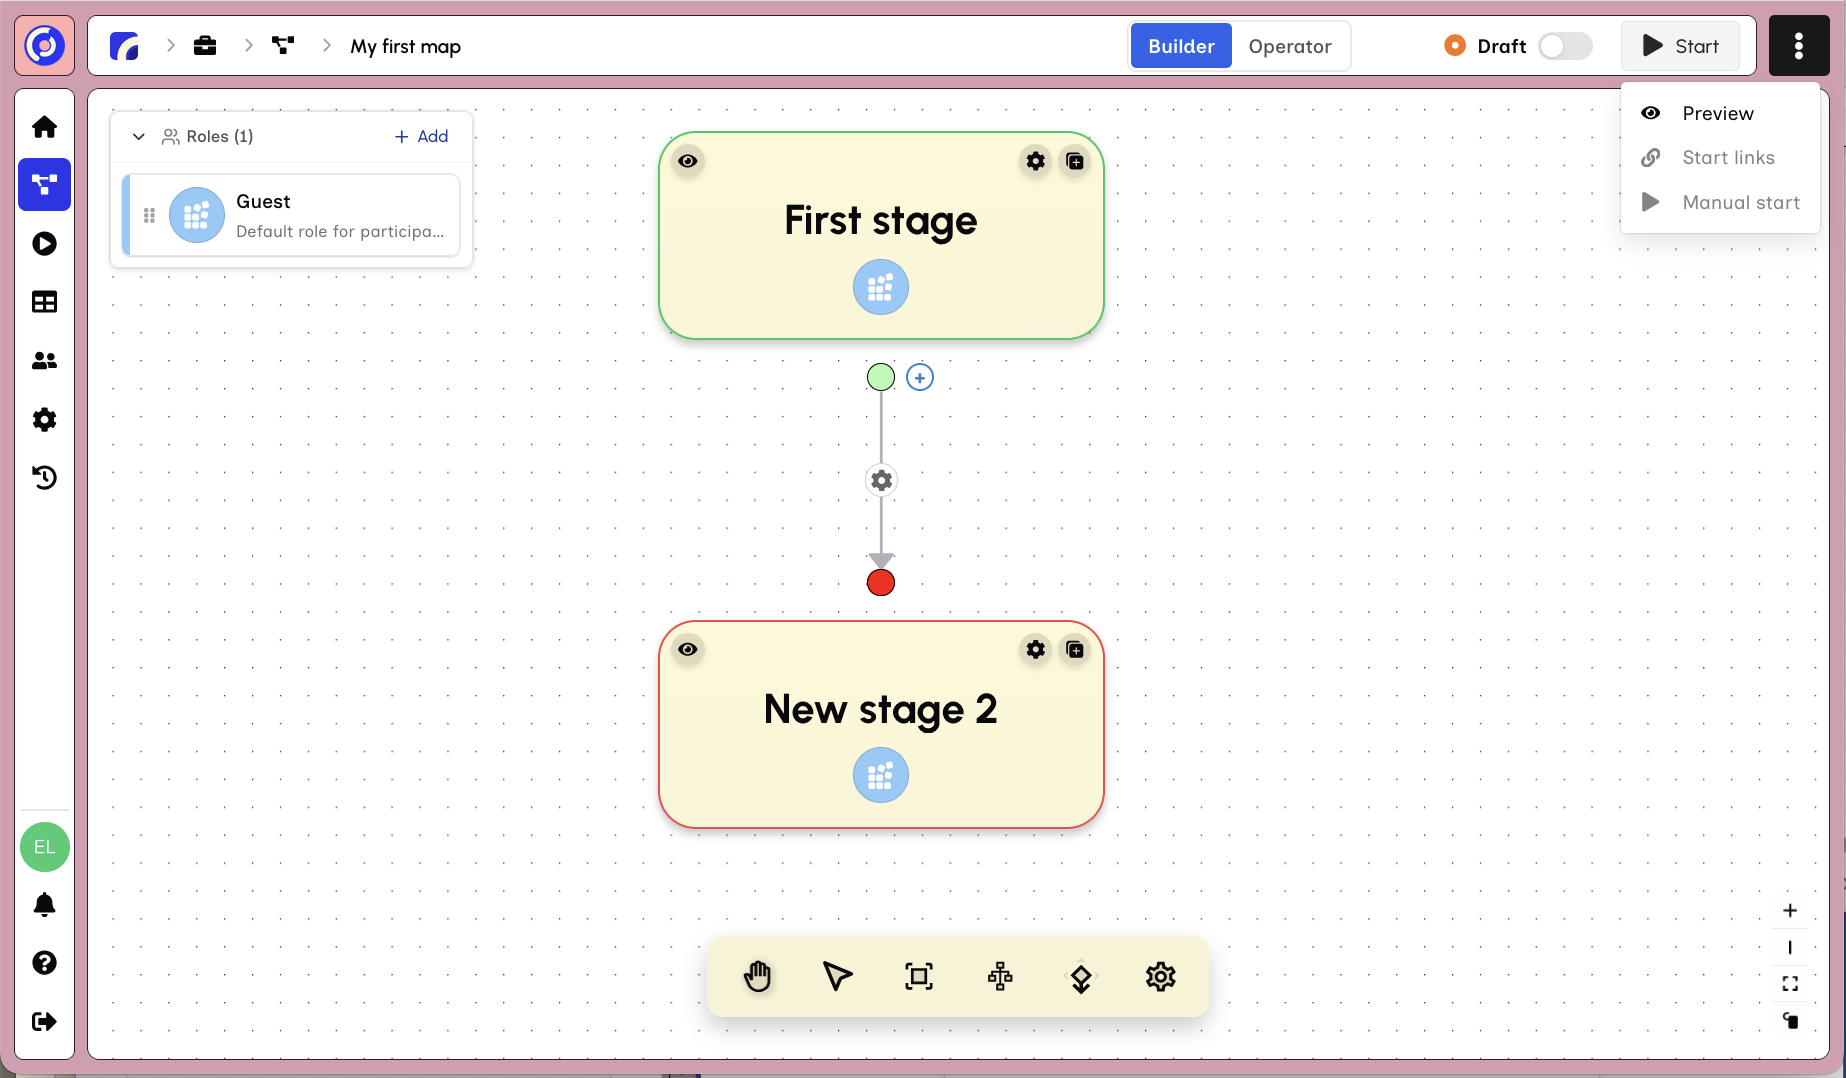
The Start menu provides three options:
- Preview - Opens a preview session starting from the first stage
- Start Links - Generate shareable links for participants to start sessions
- Manual Start - Manually start a session for specific participants
Click Preview to open the Map preview in a new tab.
The Preview Experience
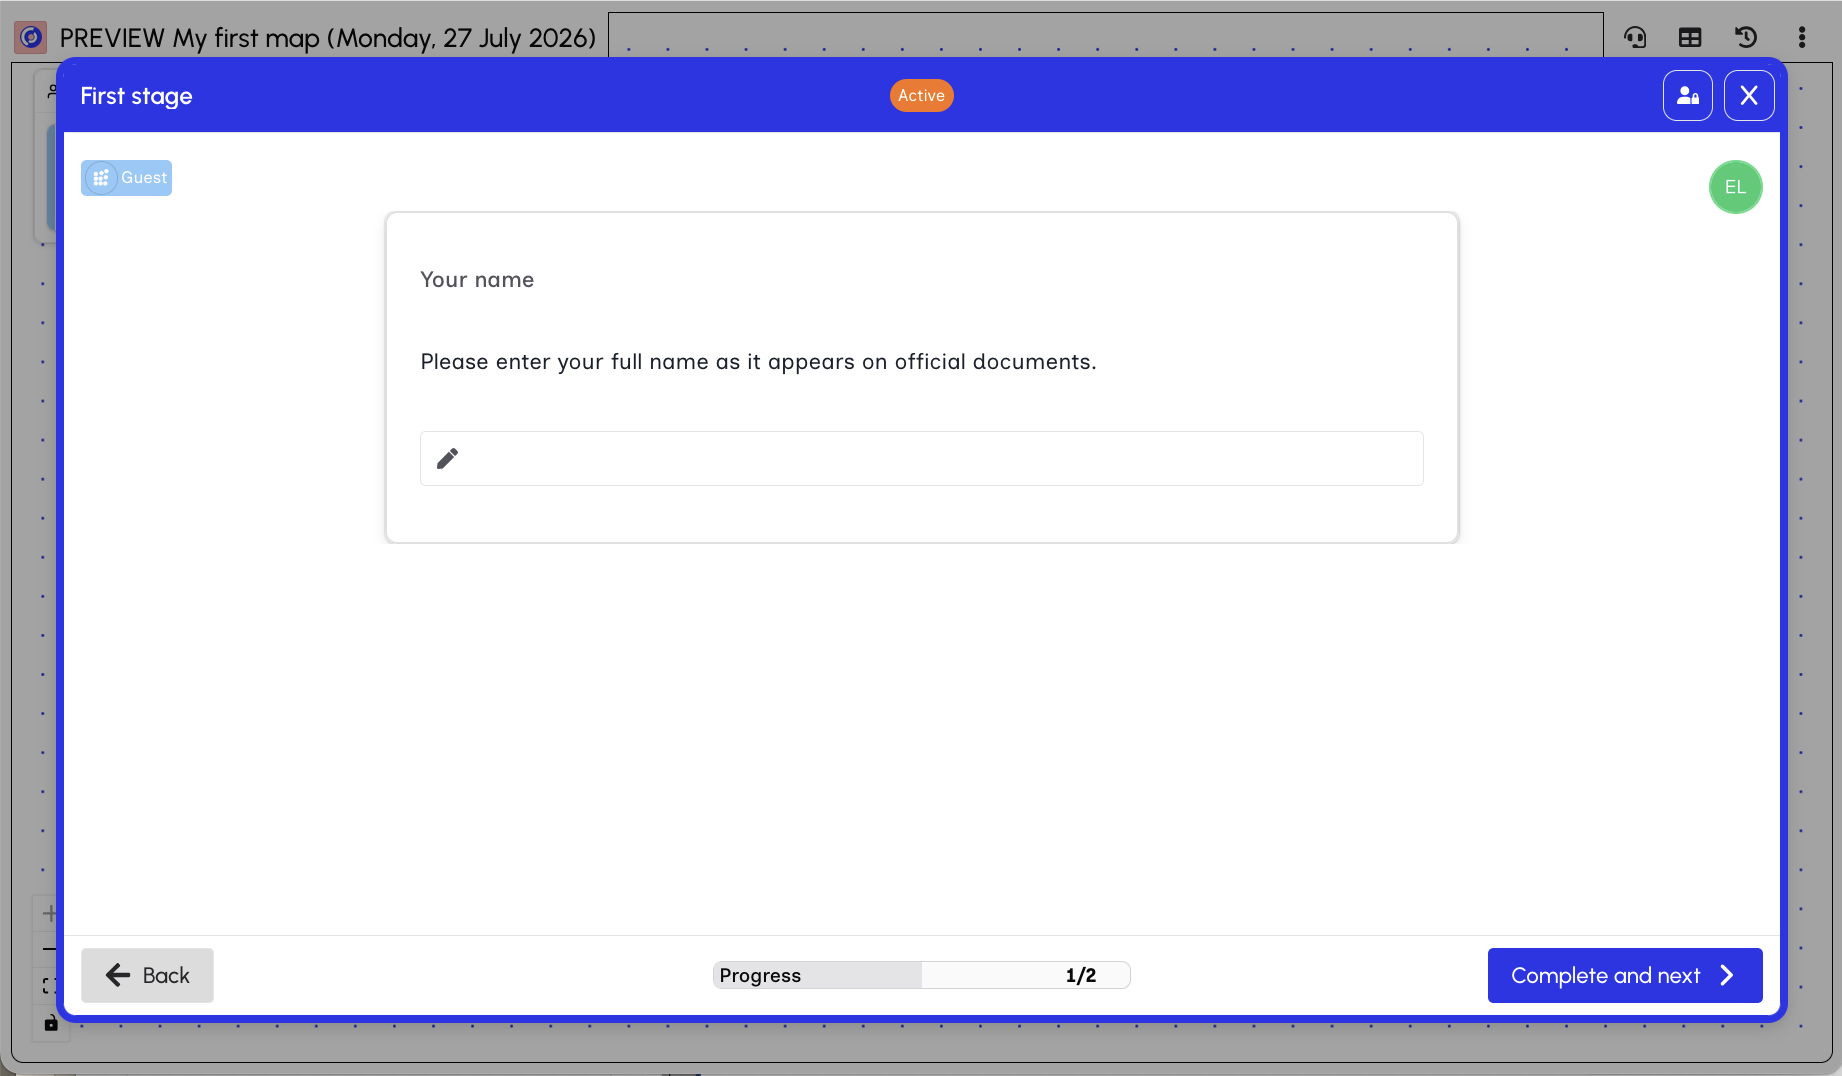
The preview shows exactly what participants will see:
- Header - Shows "PREVIEW" badge with Map name and date
- Admin button - Toggle the admin panel for Map / Session navigation
- Stage title - Current stage name with "Active" status badge
- Role badge - Shows the current role (e.g., "Guest")
- Form content - The configured blocks and fields
- Progress indicator - Shows "1/2" (stage 1 of 2)
- Navigation - "Back" and "Complete and Next" buttons
- Close button - Exit the preview and return to the builder
Use preview mode to test your Map flow and verify that all content displays correctly before publishing.
Publishing Your Map
When your Map is ready for participants, you need to publish it. In the top toolbar, toggle the Draft/Published switch from "Draft" to "Published".
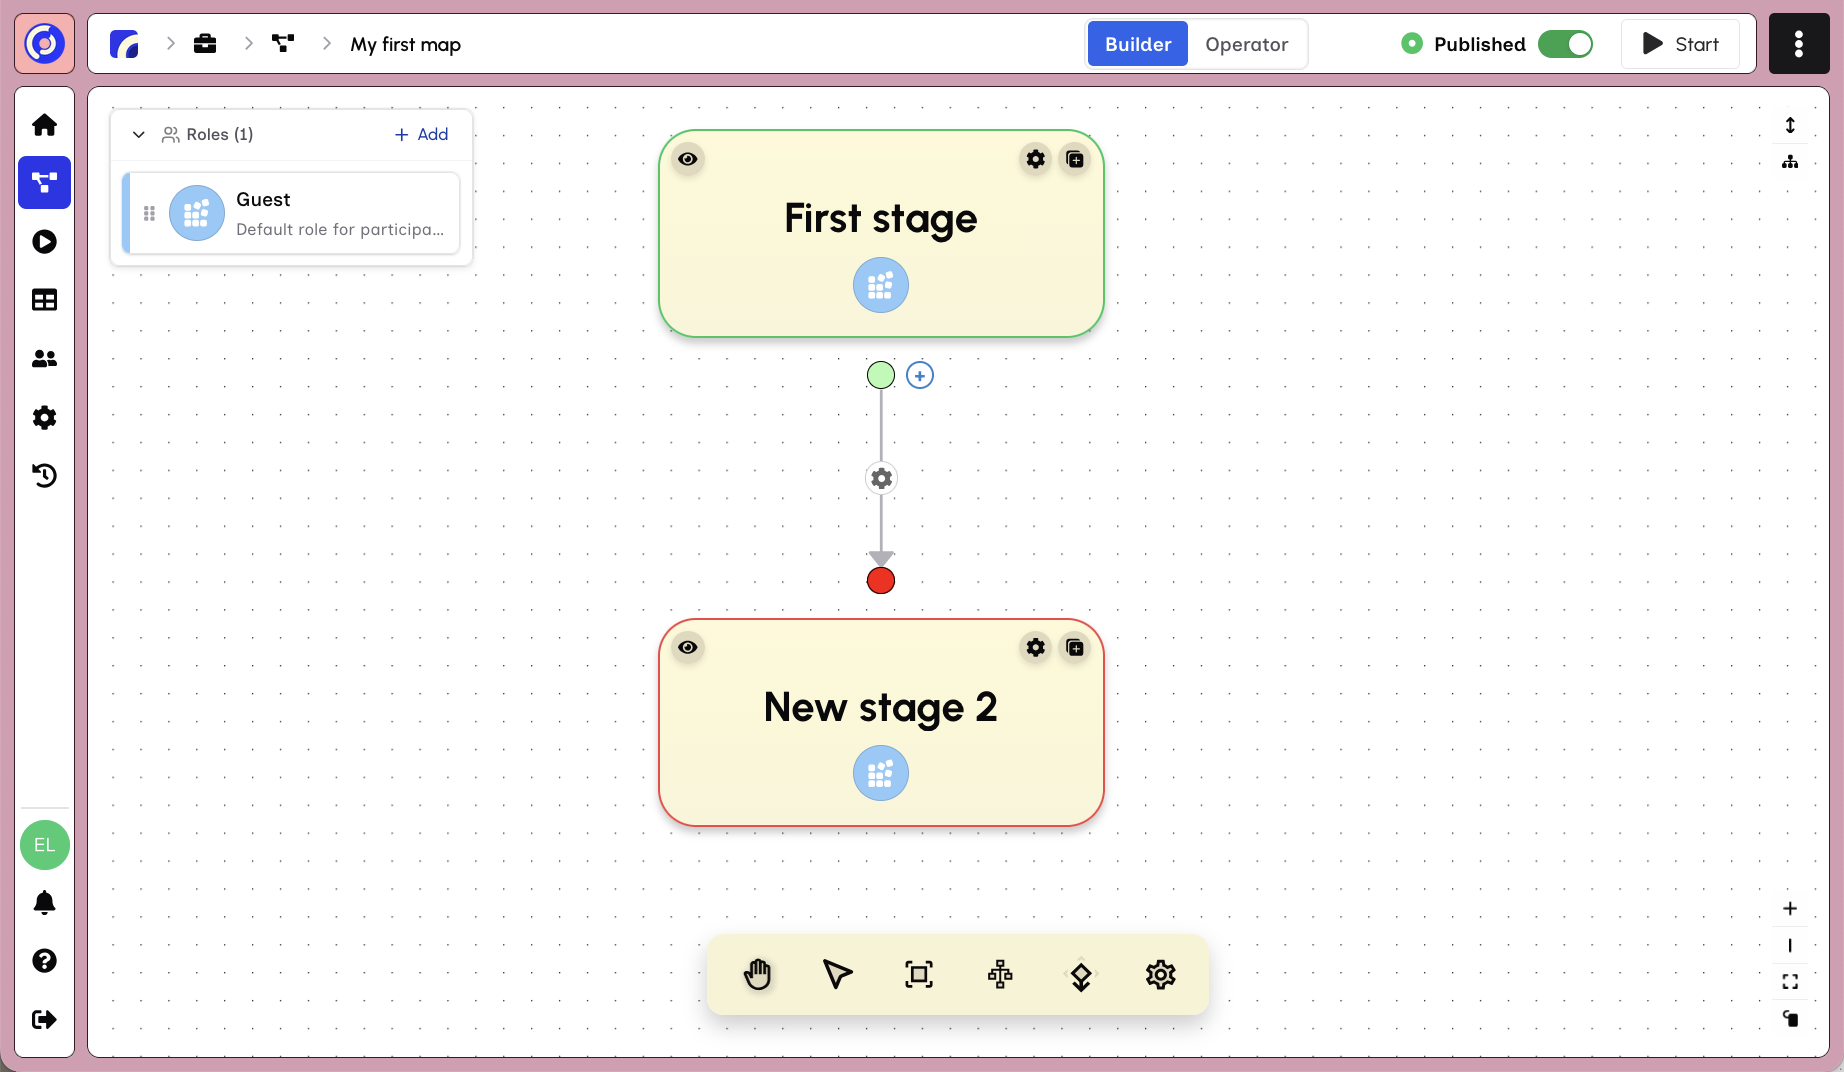
Once published:
- The toggle shows "Published" with a green indicator
- The Map becomes available for sessions
- You can still edit the Map while published
Creating Start Links
Start links allow users to begin sessions without being workspace members. Click Start in the top toolbar, then select Start Links.
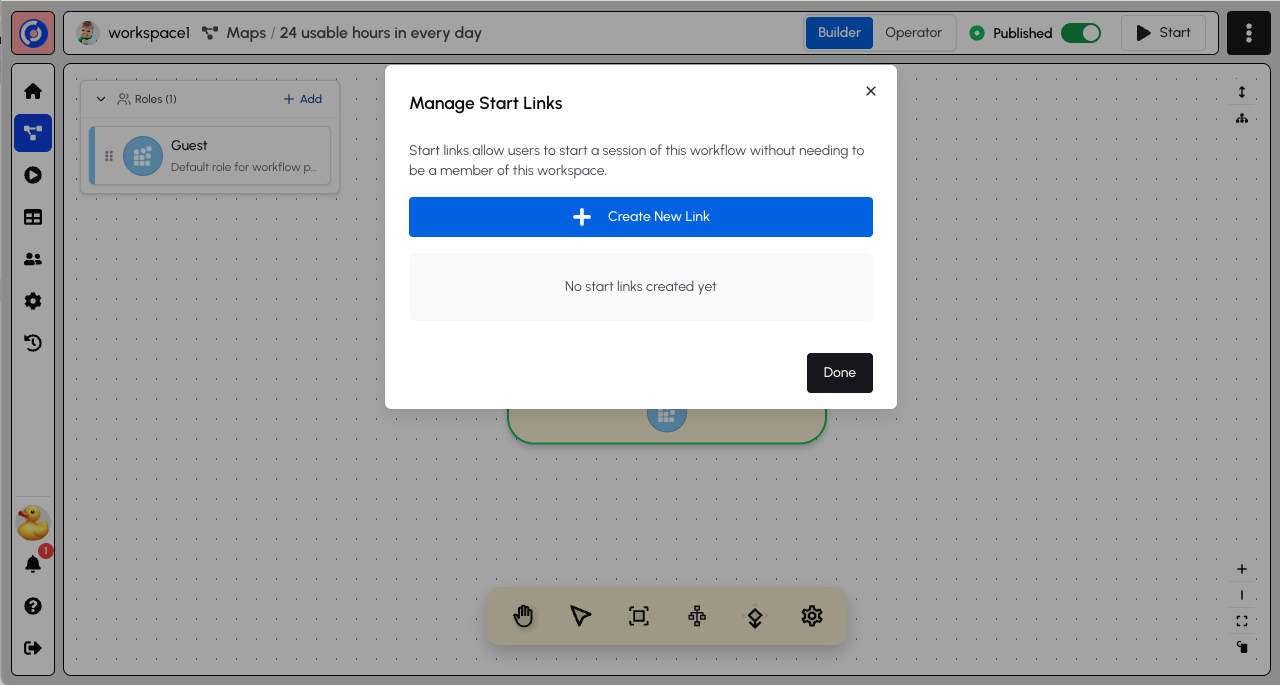
The Manage Start Links dialog explains that self-service links let users start sessions without workspace membership and allow you to pre-assign roles. Since you have no links yet, select Create New Link.
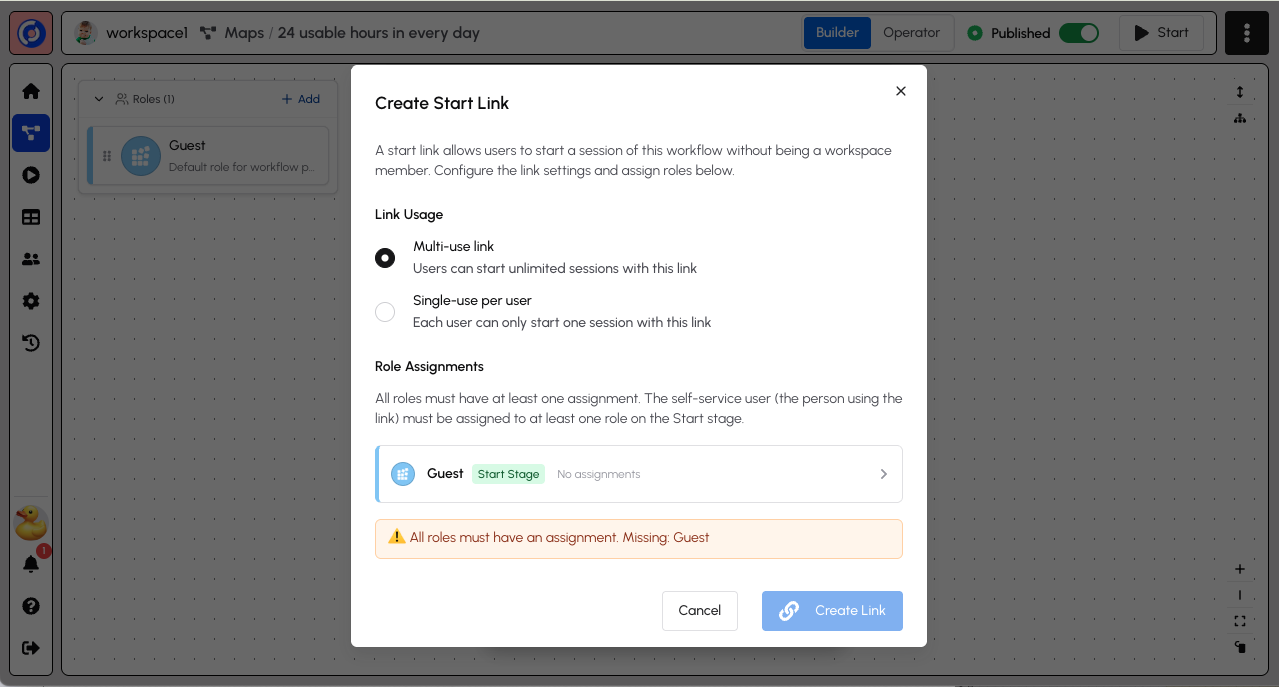
Single Session vs Multiple Sessions
When creating a link, you can set it to be Multi-use or Single-use per user:
- Multi-use - Users can start multiple sessions with the same link. Useful for repeatable processes.
- Single-use - Each person can only start one session with this link. Ideal for applications, surveys, and tests where you want one submission per user.
Who can use this link?
By default, anyone who signs in can use the link. You can optionally restrict access to organization members or specific email domains. See Start Links for the full set of options.
Role Assignments
Next, you must assign one or more users to each of the roles in your Map. For every role, choose:
- A specific workspace member - Pre-assign a known user to this role
- Self-Service User - Whoever clicks the start link will be assigned to this role
For most public-facing Maps, select Self-Service User. Whoever uses the start link will be assigned to that Map Role for the Session.
Assign Self-Service User to a Map Role on the start stage. Otherwise, the person who opens the link cannot begin.
Once you've assigned users to all roles, you will be able to select "Create Link".
Active Start Links
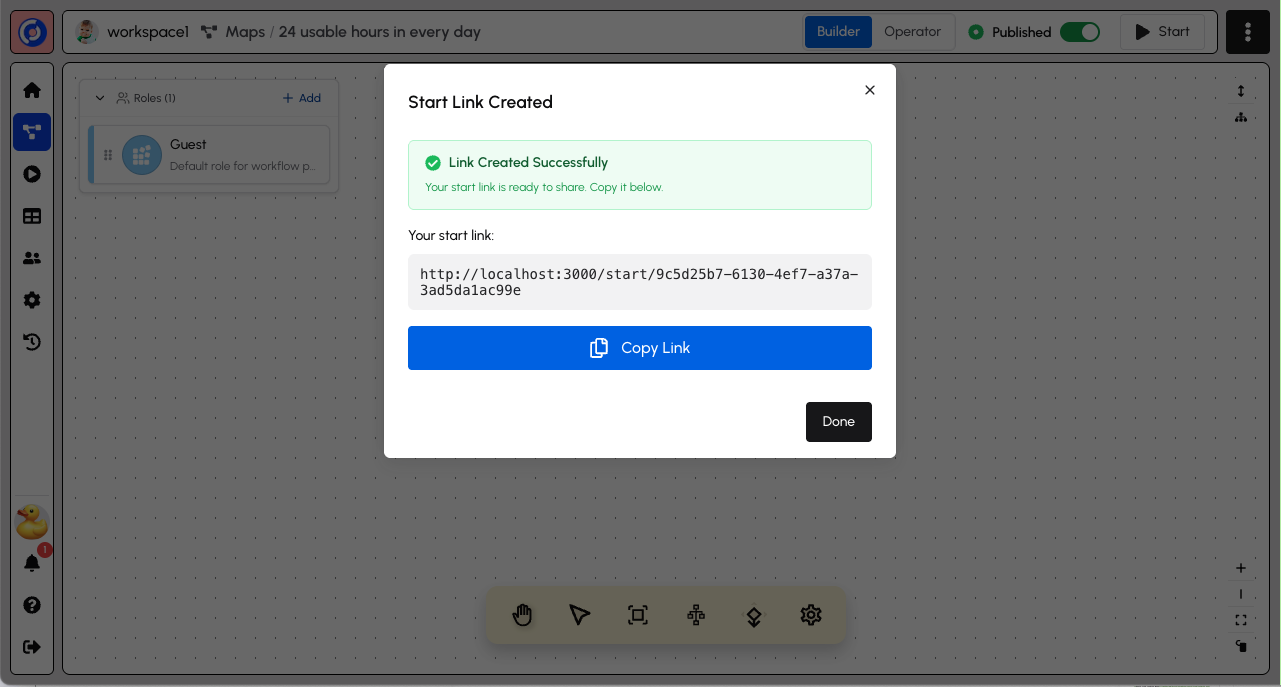
The confirmation message shows the new start link and lets you copy it.
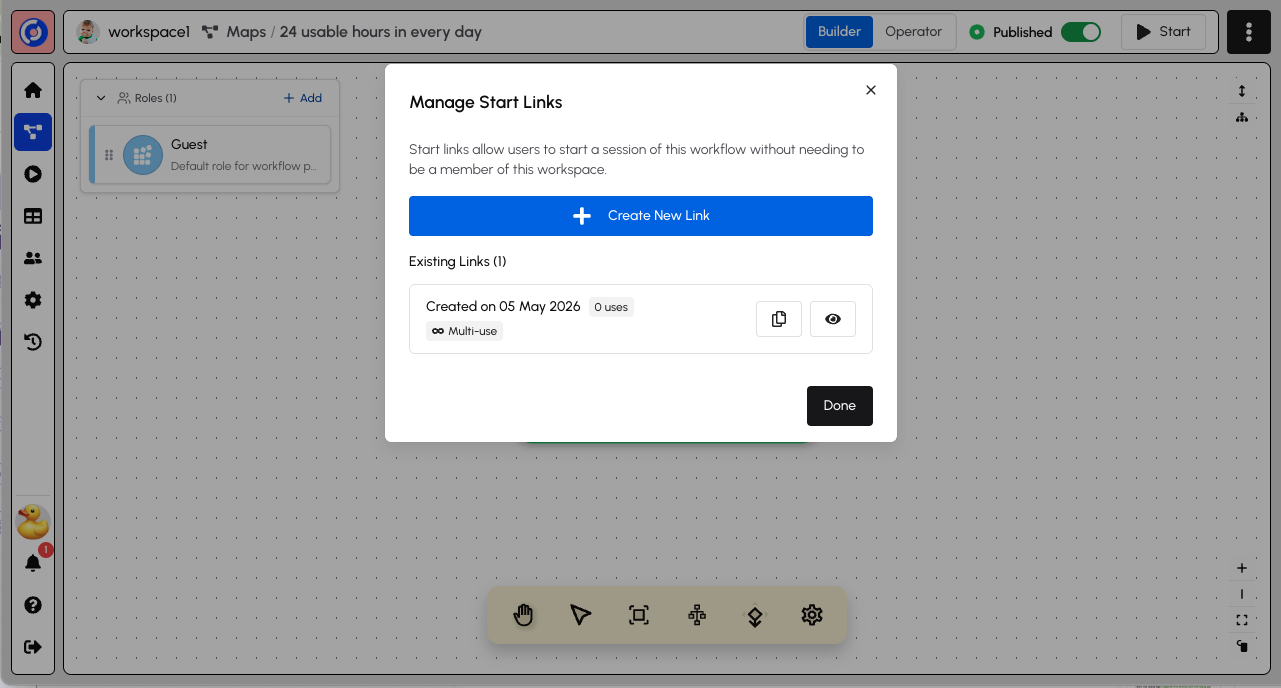
Back on the Manage Start Links view, you'll see your newly-created start link, as well as some high-level information about it. You can copy the link from here, as well as revisit the details.
The list shows:
- Creation date and usage count
- "Multi-use" vs "Single-use" badge
- Copy and Details buttons
Open Details to review role assignments or disable the link.
You can now share the start link URL with participants. When they click the link, they'll be able to start a session and will be assigned to the Guest role automatically.
The Start Link Landing Page
When participants click a start link, they see a landing page with information about the Map.
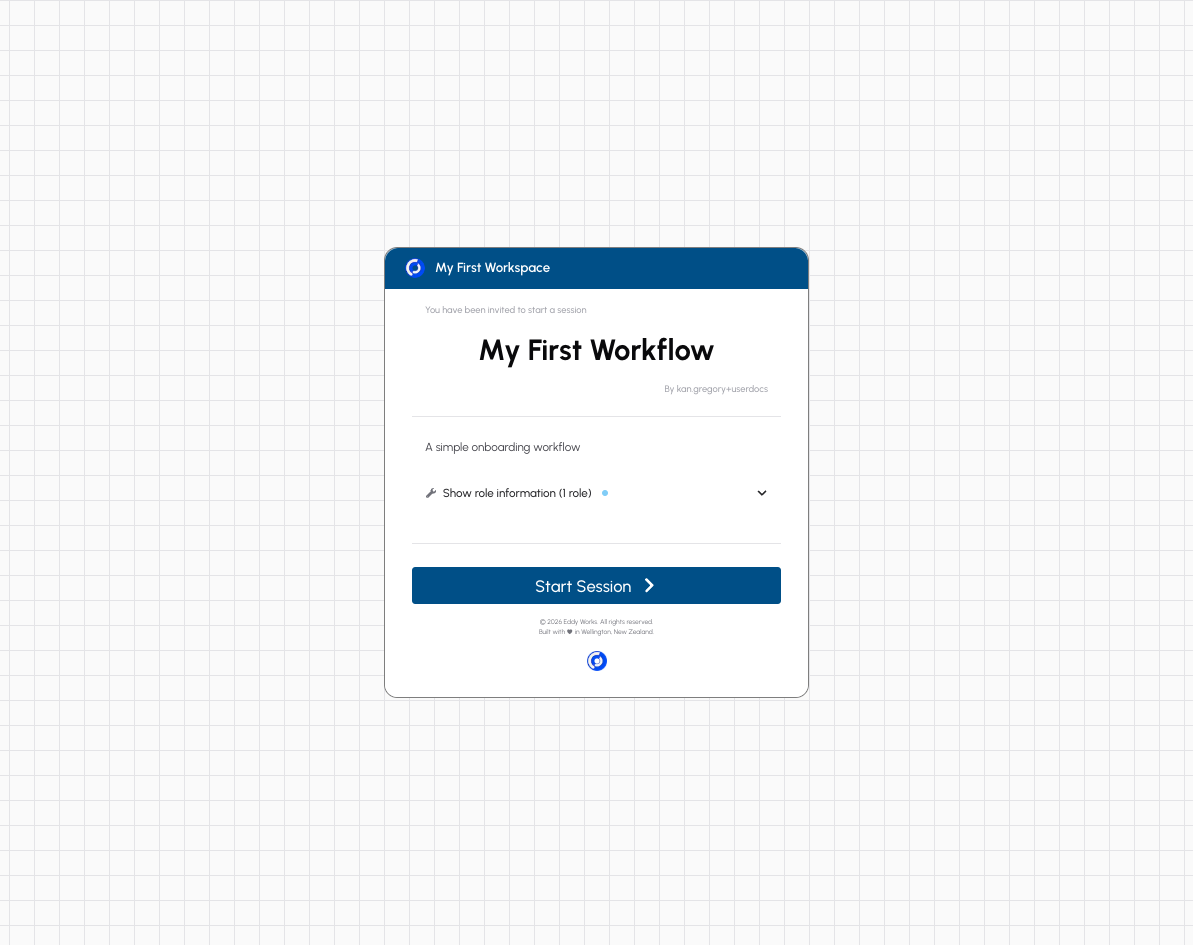
The landing page shows:
- Workspace name - "My First Workspace" in the header
- Invitation message - "You have been invited to start a session"
- Map title - "My First Map"
- Author - Who created the Map
- Description - "A simple onboarding Map"
- Role information - Expandable section showing assigned roles
- Start Session button - Begins the Map session
Click "Show role information" to see which role you'll be assigned.
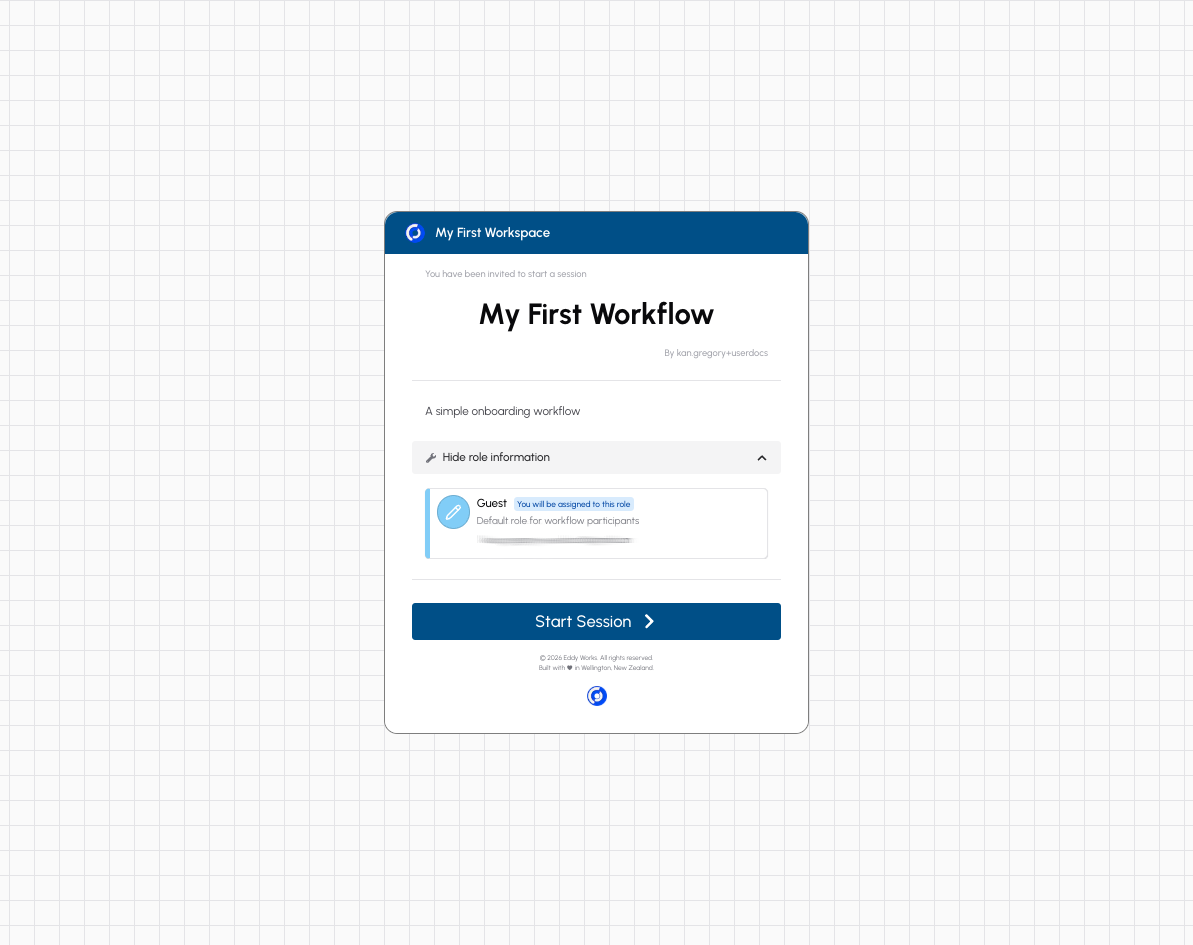
The expanded role section shows:
- Guest role with a "You will be assigned to this role" badge
- Role description - "Default role for Map participants"
- Your email - Confirms your identity for the session
Click Start Session to begin the Map. You'll be taken directly to the first stage.
Next steps: To learn about the session experience from a participant's perspective, see the Sessions section.
Tip: Once participants start using your Map, you can monitor their progress in the Operator view. Switch from Builder to Operator using the toggle in the top bar to see where sessions are and identify any bottlenecks.